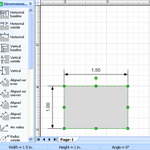
 Whether you’re a Visio end-user creating measured drawings, or you’re developing a Visio solution with customized Visio shapes, at some point, you’ll want to know how big your shapes are, and how to precisely resize them.
There are several ways to do this, and many of them allow you to edit the data as well. Today’s post offers a run-down of the many ways that you can edit and view the size of your Visio shapes!
Let’s list a quick overview of the shape-size related areas we’ll talk about today. They cover the user interface, masters in stencils, and automation code:
- Size & Position Dialog
- Status Bar
- Ruler & Grid
- ShapeSheet
- Dimension Lines
- Wall, Window & Door shapes
- Automation
Size & Position Dialog
The easiest way to view and edit the size of your shape is by using the Size & Position Window. You can show and hide this window via: View > Edit > Size & Position Window.
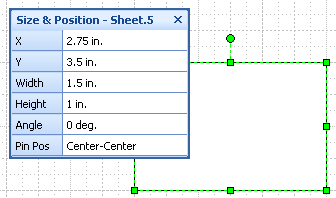
You can also the position and angle of the shape, along with the Pin location on the shape itself. The Pin is the point which positions the shape on the page. CAD users might think of it as the “insertion point”. The Pin is also the point about which the shape rotates when you change the angle. So the Pin actually has two important positions: the point where it hits the page, and the point where it passes through the shape!
The Size & Position window shows information about the selected shape. If more than one shape is selected, then the windows shows data pertaining to the primary selection, which is the first shape that is selected. You can tell which shape is the primary selection because it has darker, thicker highlight-line than the other selected shapes.
If more than one shape is selected, edits that you make in the window will apply to all selected shapes, so this is a great way to give many shapes the same size attributes!
Status Bar
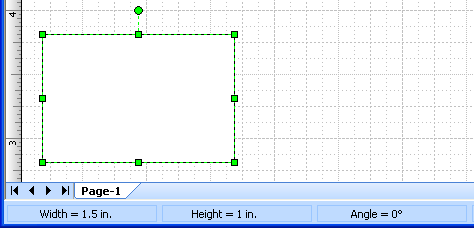
Way down at the lower-left of your main Visio window is the status bar. When you select shapes with the pointer tool, the status bar shows the Width, Height and Angle of the primary selection.
Ruler & Grid
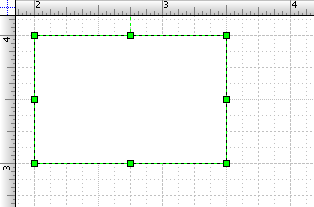
The rulers on the top and left side of the drawing window, along with the page grid allow you to quickly gauge the size of your shapes.
If your shapes don’t need to be odd sizes to three decimal places, then using the rulers and grid, along with the corresponding snap settings can be the quickest way to get your shapes to be the right sizes.
You can toggle the rulers and grid on and off via: View > Grid and View > Rulers. You can change the snap settings for your drawing under: Tools > Snap & Glue or click the toggle buttons on the Snap & Glue toolbar.
ShapeSheet
Dev-types might already have discovered the ShapeSheet. This is the spreadsheet-like interface behind every Visio shape that defines the size, position, geometry, protection, Shape Data fields, and other attributes of a shape.
If you click Window > Show ShapeSheet, you’ll see something like the window below. At the very top of the window are cells that hold values for Width and Height, as well as many other size and position-related values.
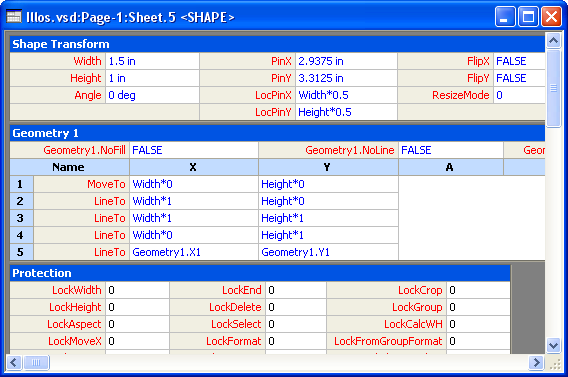
In addition to values, the ShapeSheet can also accept Excel-like formulas. This allows shapes to reference each other, or contain conditional logic–the building blocks of Smart Shapes!
If are interested in learning more about creating Smart Shapes and adding intelligent behavior to your Visio shapes, then have a look at John Goldsmith’s excellent “getting started” article:Just For Starters.
Dimension Line Shapes
There are several stencils that ship with Visio that are full of dimension lines. You can drag and drop various dimension lines into a drawing page and place them on your shapes to show how big they are.

If you turn on Snap to Shape Vertices, then it’s easy to snap the dimension line ends to vertices on your shape. You can even turn on Glue to Shape Vertices and the dimension line will follow along when you stretch or shrink your shape!
The dimension line stencils can be found in the Visio Extras folder. Or you can get to them via: File > Shapes > Visio Extras. There are three stencils:
- Dimensioning – Architectural (US Units)
- Dimensioning – Engineering (US Units)
- Dimensioning – Engineering (Metric)
Wall Shapes
If you’re creating a building- or office plan, then you’ll be using shapes from the Walls, Doors and Windows stencil. This stencil contains shapes that show their length only when they are selected:
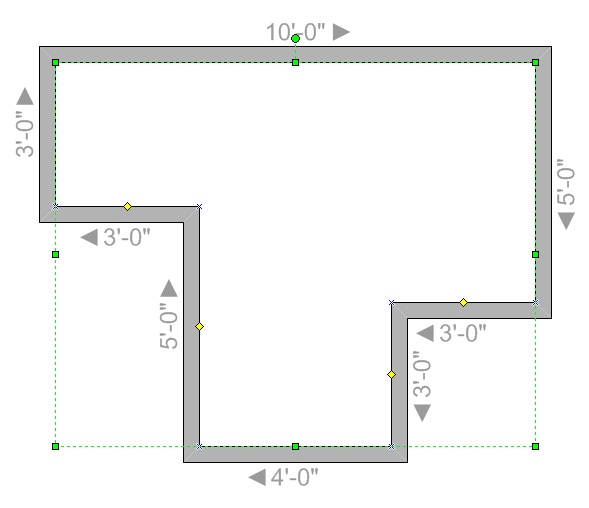
This effect is created with a combination of ShapeSheet smarts and add-on code. (The add-on program ships with Visio, and is part of the office and building plan solutions. You can’t see the code, and you don’t need to worry about installing extra programs or enabling any add-ons)
Automation
If you’re into programming, then you’ll want to be able to get and set information in Visio shapes. The code snippet below shows how you can read the values and formulas for the Width and Height of a shape that is selected in the active drawing window:
Sub WidthAndHeightStuff()

  Dim shp As Visio.Shape
  Set shp = Visio.ActiveWindow.Selection.Item(1)

  '// View Width and Height values and formulas. Note:
  '// ResultIU returns values in inches - the internal
  '// units that Visio uses:

  Debug.Print shp.Cells("Width").ResultIU
  Debug.Print shp.Cells("Height").ResultIU
  Debug.Print shp.Cells("Width").Formula
  Debug.Print shp.Cells("Height").Formula

  '// Set the values for Width and Height:using
  '// two different methods:
  shp.Cells("Width").ResultIU = 1.5
  shp.Cells("Height").Result("mm") = 2.54

End Sub
Note how you can set the result in either Internal Units (IU) or specify the units that you want to enter.

Often when I drag my dimension line to my page and use the size and position window to indicate a dimension, say 5′-0″ the dimension line will show it as 4″-12″. It doesn’t matter whether it’s 6′, 8′ or whatever size. Is there a way to correct this? It’s very annoying. Thanks.
Hi Rene,
Sounds like some sort of rounding-error, but I can’t really tell you what to do.
You said “it doesn’t matter”, which wasn’t clear to me. You ALWAYS get 4′-12″ in the Size & Position window, even if the dimension line is 6′-8″?
Which dimension line are you using? What scale is your drawing? Which version of Visio are you using?
I would like to add “depth” to my shape beside height and width. I am doing a room layout with chairs that are deep and need that size as part of the shape.
How do I do that?
Thank you
Hi Lynne,
Do you mean in the Size & Position window or on the shape itself?
Since Depth would have to be added to a shape as a “Custom Property” or “Shape Data” field, it could only show up in the View > Shape Data window, not in the Size & Position window.
The Size & Position window is purely about drawing–Visio shapes as pure graphics, not as meaningful objects.
When you create room layout objects that have depth properties, the Size & Position window doesn’t know about them. But the Shape Data window can display any custom fields that you add to your shapes.
I hope this makes sense(!)
– Chris
Hey,
Does anybody know how to create a shape using an excel file and then importing it into Visio to create a shape? I want the values in the excel file to correspond to a position in Visio Coordinate System. I know I could use the Size & Position window to move a shape to a specific location but I don’t want to manually.
Thanks,
Lenny
Hi,
How can I create a ceiling layout different in each room. In some cases I have odd shaped rooms with triangles.
Please confirm.
Thank-you
MartinH.
Martin,
you can use the area tool and change the fill of it. the area tool auto re-sizes to any weirdly shaped room you make, as long a it’s closed all around, an then you can change the fill.
I cant dimension anyting.
I am using visio to do overhead layouts. I want to add dimensions to the drawing. some walls, some shapes, some square lines…
how do i dimension point to point?
I DO NOT
have dimensions as an options under
Shapes-
— visio extras
and i was told this is where i should find this
Wait i now know. I don’t have profesional version.
Can i change dimensions form decimal to fraction measurement 1.50 to 1 1/2
Hi Dan,
I don’t think you can change the style of dimensions that show when you select the lines, but you can add dimension line shapes to your drawing that have more options.
For example, there is a stencil that you can find via:
File > Shapes > Visio Extras > Dimensioning – Architectural
that is full of dimension line shapes. Just right click them and choose “Precision & Units…”
(Note: these shapes might only be available in the Professional version of Visio – I can’t remember off hand)
I’m drawing sections of products and rather than drawing lines twice – to depict material thickness – I’m wondering if there is a parallel line or offset line convention within Visio 7?
Hi Mike,
Shape > Operations > Offset might help you.
Or create a custom line pattern with two parallel lines in it. See: Release the Power of Visio Custom Line Patterns
@Lenny,
There are several ways to link Excel and Visio.
In Visio 2007 Professional, or Visio 2010 Professional or Premium, you have the Data Linking feature.
In all versions of Visio after version 3.0 (I think), the Database Wizard is available for linking shapes to database records.
And you can always do a bit of VBA programming to get locations from Excel, choose shapes to drop, and position those shapes in Visio.
I can’t fully answer your question here, but I thought I’d at least respond!
how to hide Backgrounds (US units) in C# using visio drawing control