 A Visio newsgrouper recently pointed out that in Visio, inserted images have a different default text position than normal shapes. For images, the text is located at the bottom of the shape, and text “grows” downward.
This makes sense, since you usually don’t want the text to obscure the image. But perhaps you shape developers out there in Internet Land might wish to have the same text behavior for your shapes!
In this article, we’ll discuss how to do it by hand, and offer some VBA script to get the job done faster!
Default Text Positions
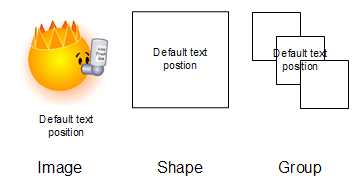
Let’s first take a quick look at what we’re talking about. In Visio, when you insert an image, draw a shape, or create a group, the default text positions look like this.

It’s easy to see that the inserted-image at left has a different default text block!
Move it Manually
We can get ordinary Visio shapes to behave just like the inserted images. To adjust your shape-text to act like the images, just do the following:
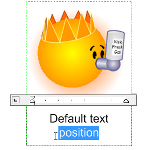
- Select the Text Block Tool from underneath the Text Tool on the StandardToolbar:

- Select your shape
- Drag the top-edge of the green rectangle all the way to the bottom
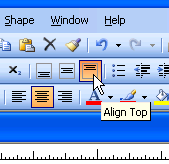
- Set the text alignment to”Top” using the Align Top toolbar button:

You’re done! Your text should now be located at the bottom of the shape, and should grow downwards, away from the shape as you type more text.
The Text Block Tool is handy for adjusting the size, position and angle of the text on any Visio shape!
Quicker With Code
Of course, for us developer-oriented folks, that’s way too much work. Here’s some VBA code to get the job done more quickly.
To get this to run, do the following:
- Paste this code into the VBA project of a Visio document
- Select some shapes in the Visio drawing window
- Run the code from the VBA editor, by putting your cursor inside the Sub and hitting F5
– or –
Run the code from the drawing page by selecting from the menu: Tools > Macros > ThisDocument > QuickTextToBottom
Here’s the code-listing:
Sub QuickTextToBottom()

  '// 2007.11.07
  '// Visio Guy
  '//
  '// Adjusts the text block of selected shapes so that
  '// the text is at the bottom of the shape. This matches
  '// the default text position for inserted images.

  Dim sel As Visio.Selection
  Dim shp As Visio.Shape
  Set sel = Visio.ActiveWindow.Selection

  For Each shp In sel

    '// 'Add' the Text Transfomrm section, if it's not there:
    If Not (shp.RowExists(Visio.VisSectionIndices.visSectionObject, _
          Visio.VisRowIndices.visRowTextXForm, _
          Visio.VisExistsFlags.visExistsAnywhere)) Then

    Call shp.AddRow(Visio.VisSectionIndices.visSectionObject, _
          Visio.VisRowIndices.visRowTextXForm, _
          Visio.VisRowTags.visTagDefault)

    End If

    '// Set the text transform formulas:
    shp.CellsU("TxtHeight").FormulaForceU = "Height*0"
    shp.CellsU("TxtPinY").FormulaForceU = "Height*0"

    '// Set the paragraph alignment formula:
    shp.CellsU("VerticalAlign").FormulaForceU = "0"

  Next shp

End Sub

What can I say but, “Thank you! Thank you! Thank you!” It was killing me trying to figure out how to do this. The simpler the solution, the harder it is to find sometimes.
Thank you again! I truly appreciate your posts here!
Jason
YAY thank you! Not sure why Visio makes things so difficult and does not center/middle text like it should, but this is just the trick I needed.
Glad you’re happy, but not sure what you mean? Visio text IS center-middle by default.
I think a lot of complaints about Visio come because it can be used for so many different types of drawing, whereas other apps excel at just a few.
Anyway, happy to help you solve your problem!
– Chris
Thanks, that was very helpful, I had been fighting with textblock alignment for a while.
How do I make the wording look realistic on an image (for example – the computer monitor image) so that t doesn’t look like it is leaning at weird angles on the screen of the image? New to Visio