 You can learn a lot from bad examples.
Call it learning-from-our-mistakes, anti-patterns, or devilish fun, there’s a lot to be gained by looking at how-not-to-do-it.
Those of us over 30 might remember our first introduction to BASIC programming, taught to us by our friend Jeff, in the electronics corner at the local super market. While Dad was shopping, Jeff went over to the Commodore Vic 20 demo kiosk and typed the following lines:
10 PRINT "Chris is a turkey!"
20 GOTO 10
Utterly useless, except for the fact that it forever singed into our memory the ideas of branching and infinite loops…
Chris is a turkey! Chris is a turkey! Chris is a turkey! Chris is a turkey! Chris is a
turkey! Chris is a turkey! Chris is a turkey! Chris is a turkey! Chris is a turkey! Chr
is is a turkey! Chris is a turkey! Chris is a turkey! Chris is a turkey! Chris is a tur
key! Chris is a turkey! Chris is a turkey! Chris is a turkey! Chris is a turkey! Chris
is a turkey! Chris is a turkey! Chris is a turkey! Chris is a turkey! Chris is a turkey
! Chris is a turkey!
Ha ha ha. Very funny, Jeff.
Well BASIC is ancient history, but we continue to get our feet wet by creating some form of “Hello World” in the latest-and-greatest programming language. Hopelessly impractical, Hello World nonetheless introduces us to the syntax and basic workings of a language.
Three Terrible Examples
So for those of you who’ve noticed Visio’s ShapeSheet, and are curious about SmartShape capabilities, this article is about having mischievous fun while learning how not to create SmartShapes.
From three example shapes, you’ll learn how to make Visio shapes do stupid things and behave very badly! And if you’re not careful, you might get practical ideas for your very-own, actually-useful SmartShapes.
If you are completely new to the ShapeSheet, I suggest first reading John Goldsmith’s excellent introduction to Visio development, the ShapeSheet, and automating Visio. The article is located here: Just for starters. This will make the rest of this article easy to understand.
For those of you who have dabbled a bit, the rest shouldn’t be too difficult.
Freak Out!
For all of our shapes, we are going to create a special ShapeSheet cell–a flag, so to speak–that indicates that it is time for the shape to behave badly.
We’ll call this the “Freak Out” flag, and we’ll implement by adding a User-defined cell called User.freakOut to each ShapeSheet of our misbehaving shapes. Generally (but not always) this cell will contain an expression that evaluates to True or False.
Other cells in the ShapeSheet can then reference this cell, in a way very similar to how Microsoft Excel works.
The choice of cells that respond to User.freakOut determines how our Not-so SmartShape behaves!
Adding User-defined Cells
User-defined cells are a great vehicle for storing parameters and calculations in your shapes that you don’t want your users to see. To add a user cell to a shape, do this:
- Select your shape
- Choose: Window > Show ShapeSheet
- Right-click and choose: Insert Section…
- Check the User-defined cells option and hit OK
- Give the first cell in the User-defined cells section a name by clicking in the left-most column where the red text is and typing a new name
- You can add more cells by right-clicking and choosing: Insert Row
That’s all there is to it!
Disappearing Shape
Ont to example #1. Our unsuspecting user decides to correct the text on the shape, and disregards the warning.
First, she selects the shape:
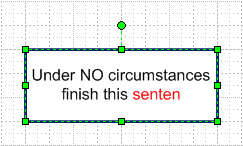
Then she enters text-edit mode by double-clicking the shape, or by pressing F2. Placing the cursor at the end of the sentence, she completes the final word:
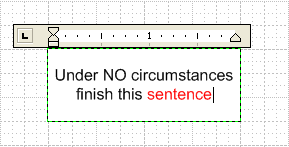
As the word “sentence” is completed, something dramatic happens: BIFF!
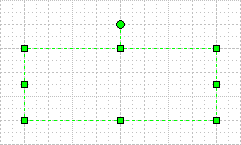
And when she clicks away from the shape, thereby de-selecting it, all visible traces of the shape vanish into thin air: POW!
Fun, eh?
Let’s look at the anatomy. Our misbehave flag looks like this:
User.freakOut = NOT( ISERR( FIND( “sentence”, SHAPETEXT(TheText) ) ) )
Wow! There are four ShapeSheet functions nested within each other! Let’s break it down a little so we can understand what it all means.
SHAPETEXT(TheText) is the way that we get an actual string that represents the text of the shape. Using this, along with various string-handling ShapeSheet functions, we can analyze the shape’s text.
A lot of beginners make the initial mistake of trying to compare strings directly in the ShapeSheet with expressions such as:
IF( “bob”=”steve”, True, False ).
This doesn’t work, because Visio tries to understand “bob” and “steve” as numerical expressions or ShapeSheet formulas, and essentially evaluates both of them as zero. The proper way to make such a test is to use ShapeSheet text-handling formulas, like this:
IF( STRSAME( “bob”, “steve” ), True, False ).
FIND simply searches the shape’s text to see if “sentence” is to be found. Very similar to the InStr function found in many programming languages. If the sub-string isn’t found, then the FIND returns #VALUE, which represents a ShapeSheet error.
If “sentence” is found, then FIND returns the position at which the sub-string appears. In this example, 36 is returned when our user completes the shape’s text.
ISERR is able to detect errors such as #VALUE.
NOT, of course, finds the case when ISERR is false, thereby reversing the results of all that junk inside of ISERR.
To get the shape to disappear, we simply turn off the geometry section that defines the box, and hide the text. That requires two references to our Freak Out flag, in two different cells:
Geometry1.NoShow = User.freakOut
Miscellaneous.HideText = User.freakOut
NoShow and HideText expect boolean values, which User.freakOut is more than happy to supply.
Intermission
Since these DumbShapes are intended to suprise, frustrate and annoy, it is really best to see them Live!, in action.
So I’ve prepared a little video that shows all three examples in motion, as your victims will experience them. The video is narrated, so turn up your speakers and enjoy!
Frozen Shape
Our next user sucker comes along and sees this shape:
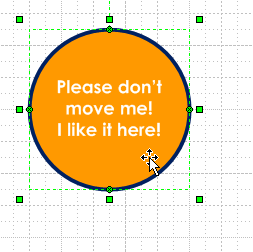
He also decides to ignore the warning and move this shape:
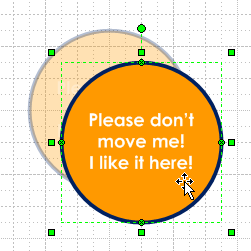
Not satisfied with the new position of the shape, he decides to move it again, only to find that it is now locked in place, and can’t be moved. How delightfully frustrating!
So how did we get this to work? Let’s look at our special User-defined cell. This one is a bit different:
User.freakOut = DEPENDSON( PinX, PinY ) + SETF( GetRef( LockMoveX ), 1 ) + SETF( GetRef( LockMoveY ), 1 )
In this case, other cells don’t react to User.freakOut. User.freakOut does the talking by pushing values into other cells!
The Pin represents the position of a shape on the page. Two ShapeSheet cells control this value: ShapeTransform.PinX and ShapeTransform.PinY.
DEPENDSON simply watches for cells within the parentheses to change. If they do, then the entire formula gets triggered for re-evaluation.
SETF is used to push values or formulas into other cells. This is kind of backwards to the way spreadsheets are supposed to work. You can get some really cool effects doing this, but if you get too tricky, you can also create quite a mess!
In this case, we are pushing the value 1 into the cells Protection.LockMoveX and Protection.LockMoveY. This keeps the shape from being moved (but not resized!)
GetRef does two things: it shields the formula from being evaluated by changes to LockMoveX or LockMoveY. After all, we only want the cell to evaluate when the shape is moved, i.e., when PinX or PinY is changed.
The second purpose for GetRef is to maintain links to named-cells that might change during the development process. For instance, I might have started out with a flag called User.f. Then later renamed it to User.flag.
GetRef( User.f ) will update to GetRef( user.flag ) when the change is made, thus freeing the developer from extra worry.
In older versions of Visio, GetRef didn’t exist, so target cells were enclosed in quotes: SETF( “User.f”, 1 ). Changes to named cells weren’t updated, because the quote marks hid them from the ShapeSheet engine, and lots of stuff got broken as a result.
Convenience and Sneakiness
Now, being a developer, of course I’ve left myself an out. If you double-click the shape, then the locked cells are reset to 0, so the shape can be moved. Again, SETF is employed to do this:
Events.EventDblClick = SETF( GetRef( LockMoveX ), 0 ) + SETF( GetRef( LockMoveY ), 0 )
Since we needed to reset two different cells, we just add two SETF expressions together. The result isn’t important in this case, just the pushing of values to the LockMoveX and LockMoveY cells.
And, we can again move our shape (once!) before it gets locked down again by our ShapeSheet shenanigans. Note also, that double-click won’t get you to text-edit mode. The expression in EventDblClick overrides and eliminates this behavior.
Dr. Jekyll & Mr. Hyde
Well, we sure hope you’re having fun! Our last example is a bit more complicated, and covers several topics, and should probably be a separate article. So if your boss is coming, bookmark this bit and come back later.
The concepts we’re going to need to understand to get Mr. Hyde to show his ugly mug include:
- Referencing the Page’s ShapeSheet
- Determining a shape’s ID
- Inserting Text Fields
- Referencing the group’s ShapeSheet from sub-shapes
Phew! Time to get up and stretch. See you in a few minutes…
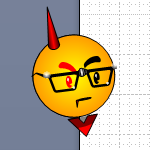
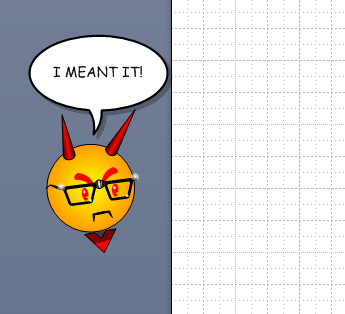
In our last example, Visio Guy politely states his Pin Preference:
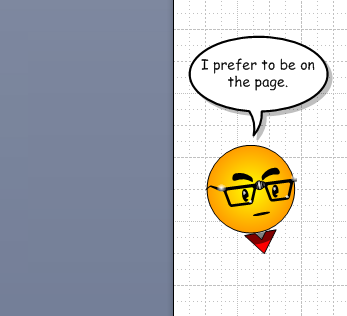
Again, another disrespectful user comes along, disregards the warning, move Mr. Guy off of the page, and receives the punishment he sorely deserves:
So what’s the anatomy of this beast?
User.freakOut = OR( PinX<0, PinX>ThePage!PageWidth, PinY<0, PinY>ThePage!PageHeight )
Well, that looks like a lot, but it’s not really rocket science.
The OR function just says; “I am True if any of the conditions between my parentheses is true.”
And there are four conditions inside this OR function. They determine if the shape is off the page on any of the four sides:
- To the left: PinX < 0
- To the right: PinX > ThePage!PageWidth
- To the bottom: PinY < 0
- To the top: PinY > ThePage!PageHeight
Note the syntax for cross-sheet references. The ! is used to distinguish other “sheets”: ShapeSheets belonging to other shapes. In this case, we are referring to a special shape called ThePage, which–you guessed it–represents the actual page upon which we are drawing!
We can now tell if our shape is on or off of the page!
Smart Text
To control the text, we then created:
User.text = IF( User.freakOut, “I MEANT IT!”, “I prefer to be on the page.” )
and inserted it as a field in the word balloon. Since the word balloon is a sub-shape, we needed to do a little more work…
Referencing the Group
The whole shape is a group, containing several sub-shapes. In order to reference the top-level shape from a sub-shape, we need to know the ID of the top-level, group shape. We get this from the Format > Special dialog.
Now, in Visio 2007, this menu item isn’t on by default, so we need to turn on “Developer Mode” by going to: Tools > Options > Advanced tab and checking: Run in developer mode.
So let’s say that our group’s ID is 27, which we see right next to ID: label, at the top of the Special dialog.
Knowing the group’s ID, a sub-shape can refer to cells in the group’s ShapeSheet using the !-syntax we mentioned earlier. For instance, a sub-shape could be 1/2 the width of it’s parent with a formula like this:
Width = Sheet.27!Width*0.5
Inserting Text Fields
Armed with the ability to make cross-sheet references in our formulas, we set off to link the word balloon’s text to the group’s User.text cell.
So we sub-selected the word balloon and pressed F2 to enter text edit mode. Then, we chose: Insert > Field from the menu.
This is where we enter smart formulas for a shape’s text. From the Category list, we choose Custom Formula, and enter:
Custom Formula = Sheet.27!User.text
Our word balloon will now reflect the value of User.text in the group’s ShapeSheet.
Showing, Hiding and Coloring
Each of the horns has its visibility controlled by:
Geometry1.NoShow = NOT( Sheet.27!User.freakOut )
The eyebrows rotate and change color like this:
Shape Transform.Angle = GUARD( IF(Sheet.27!User.freakOut,-20 deg, 0 ) )
Fill Format.FillForegnd = GUARD( IF( Sheet.27!User.freakOut, RGB( 255, 0, 0 ), RGB( 0, 0, 0 ) ) )
And the eyes change color in a similar fashion.
Well, I hope you’ve found this article not only entertaining, but slightly educational. Now get out that copy of Visio sitting under your monitor and give some of these concepts a try!
Related Reading
If you’re interested in learning more about how to hide shapes and parts of shapes, be sure to check out: The Hidden World of Visio Shapes.
And by the way, you can find that snazzy word balloon shape in this appropriately-named article: Word Balloon Shape

Thanks for the video, mate! Loads easier to understand the article. The subshape text stuff was nice, I couldn’t figure out how to insert info about the group.
Brilliant … I hope you have trademarked VisGuy!
Great teaching article!
Hi, is there a bitwise compare operator I can use for the NoShow field?
Hi Johan,
The ShapeSheet has these functions that you’ll find useful:
BITAND()
BITNOT()
BITOR()
BITXOR()