 I wanted to share some tips about using Visio’s Boolean operations, and came up with this topical subject to do it!
Visio is not really a CAD or illustration tool. It’s bread-and-butter is in arranging pre-made shapes. But someone has to create those shapes in the first place. And if you’ve invested time into learning Visio, and you find it a kick to fiddle with, you might be the one to whom such tasks fall.
Visio doesn’t have a huge set of tools for precision drawing, but you can do quite a bit if you learn some of its quirks and intricacies.
I made a video that will show you a set of more obscure features often referred to as Boolean operations. You can watch the video right now, but I’ll do a quick summary in this article if you’re not in a place to watch videos. It will also help to catch search engines’ attention by having a few keywords and phrases.
Here’s the video:
Developer Tab
Visio has a set of Boolean operations, which you can find on the Developer ribbon tab. This tab isn’t visible by default, so just right-click a blank area of the ribbon and choose Customize the Ribbon. In the pop-up, you can check the Developer tab in the list on the right.
With the Developer tab visible, you can go to: Developer > Shape Design > Operations to see a list of the Boolean operations.
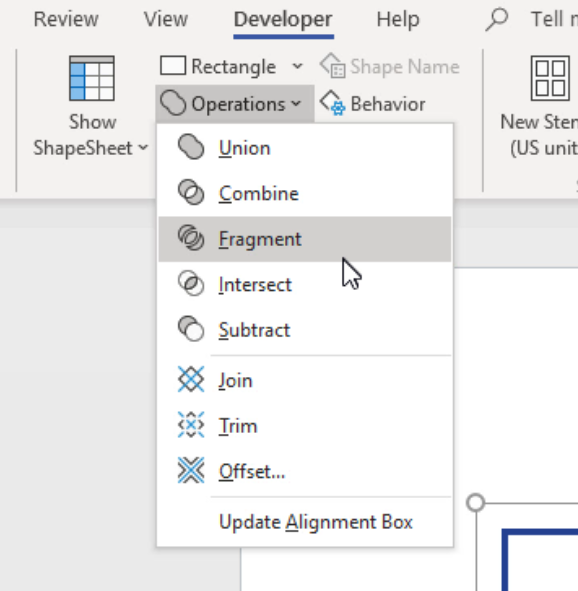
These operations are useful for cutting lines and areas into smaller pieces, as well as combining lines and areas into bigger pieces! The video will show some of the features in action, but be sure to try them out for yourselves. Generally, you’ll want to have two or more overlapping shapes selected, before calling one of the operations.
Note that the top functions: Union, Combine, Fragment, Intersect, and Subtract are more concerned with areas, while the lower Join and Trim functions are concerned with line segments.
Trimming, Joining and Combining
In the video, I use Trim, Join, and Combine to create a nodule element for placing around the virus’ core (a circle).
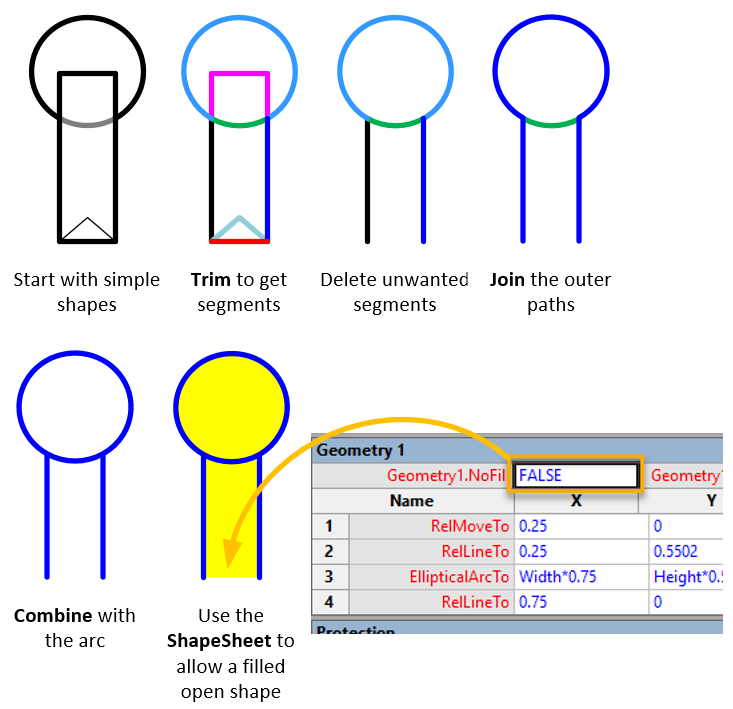 The nodule is open at the bottom, but I still wanted it to take a fill. You need to use the ShapeSheet for that. The ShapeSheet is only available when the Developer tab is visible, so it’s a good thing we’ve already activated it.
You can right-click and shape and choose Show ShapeSheet from the top of the menu. In the case above there will be two Geometry sections. The one with more rows is the main outline of the nodule. We just have to reverse the value of Geometry1.NoFill so that is is FALSE instead of TRUE. When we do that, the shape will display a fill color, when applied!
Moving the Rotation Point
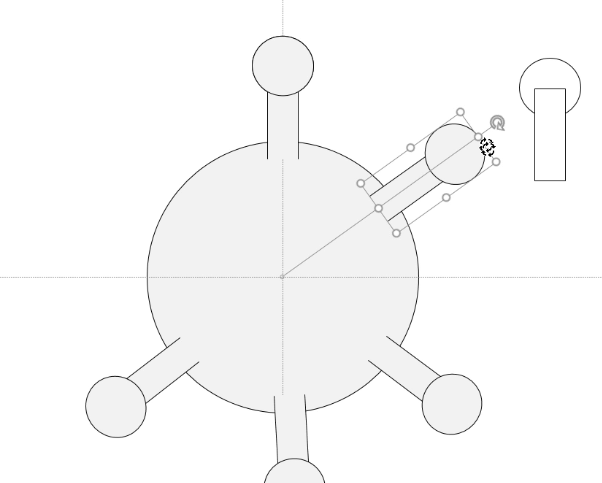
Once I had a nodule, I lined it up at the top of a larger circle. You can see how the open end makes it look like it blends into the circle, just like a real virus (*cough*).
I then moved the pin of the nodule shape to the center of the circle. You do this by hovering the mouse over the rotation handle, until the pin shows in the middle of the shape. You can then drag it away from the center of the shape. In this case, I centered a horizontal and vertical guide on the circle, then dragged the nodule’s rotation point to the intersection of the guides.
I then Ctrl + Dragged five duplicates of the nodule, and aligned them with the original nodule (using the Home > Arrange > Alignment functions.)
With six stacked copies of the nodule, it became trivial to select each one and rotate it into place:
 I duplicated the first set of six nodules, rotated them a bit, resized them to be a bit smaller, then sent them to back so that they were behind the circle. These are the smaller, lighter nodules you see below.
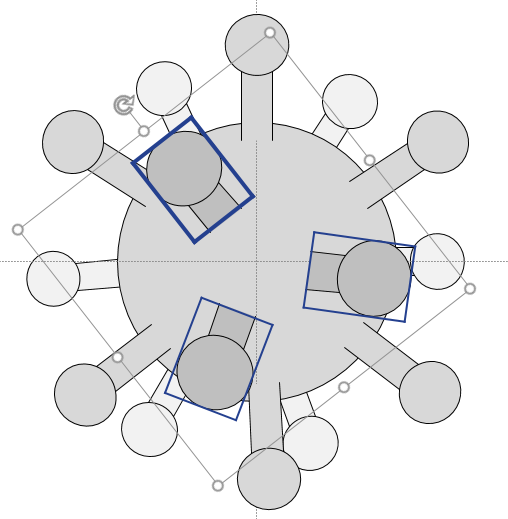 I then added three stubbier versions of the nodule, but made them larger. Those are the foreground bumps, which complete the illustration and the illusion.
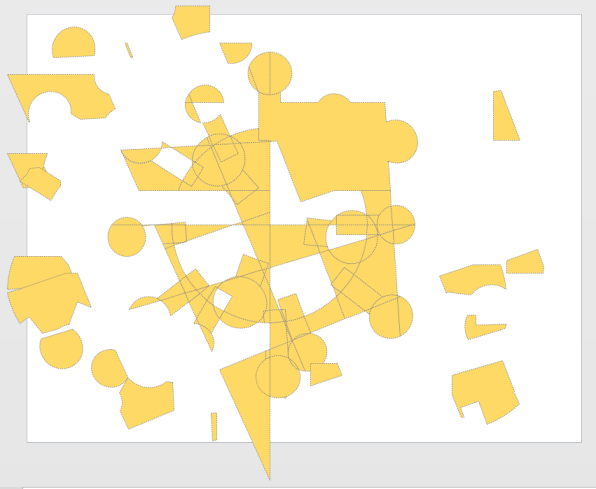
Finally, I practiced good hygiene by introducing “soap” to the drawing: I drew a bunch of crisscrossing lines all over the page. I then selected everything (Ctrl + A), and fragmented the whole business using Developer > Shape Design > Operations > Fragment. This completely obliterated the virus, dividing it into many small bits and pieces, which could easily and harmlessly be dispersed:
Thanks for reading. I hope you are all doing well and staying healthy!

Hi Chris,
Excellent demo of the binary operations. The subject was also very topical.
i learnt a couple extra short cuts thanks to your narrative.
I am running 2016 pro. I have been a power user since 2002.
All the best
Cliff