 A recent foray into learning a new instrument spurred the development of a Visio SmartShape that can be used to annotate trumpet valve fingerings on sheet music.
Update 2018.02.01: I added the “Reverse Order” feature. Valves are now numbered top-down, but you can flip the order if you want. The images in this article, and the download have been updated.
Last month, Santa Claus brought me a special present. I awoke on December 25th to find this shiny instrument waiting for me under the tree.
It was a pocket trumpet from the Taiwanese manufacturer Carol Brass. It has as much tubing as a regular trumpet, but the tubes are twisted a bit more, so it takes up a lot less space in your closet.
It is beautifully constructed, especially considering the fairly low price. It’s really a kick to play around with, and I love the brushed metal satin finish. Have a look:
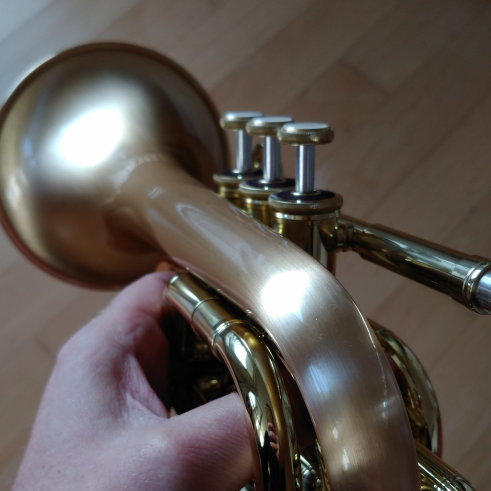
The problem is, I’m a trombone player who has spent many decades wallowing in the wonderful world of The Analog. So these button contraptions were a mystery to me. They are so…frustratingly…digital!
So I needed a bit of retraining. A quick search of the web for “trumpet fingerings” quickly revealed that I’m not the only one who was at a loss. There are several varieties of fingering charts, as you will see in the image results of said search. The fingering charts show which valves to press for which notes. The computer nerd in me quickly appreciated the “binarity” of it all. Three valves, eight combinations, how fun!
These thoughts quickly led me to the idea of creating a Visio shape that could be used atop imported screenshots of sheet music. So I quickly set to work creating a Visio SmartShape that could easily display trumpet fingerings like this:
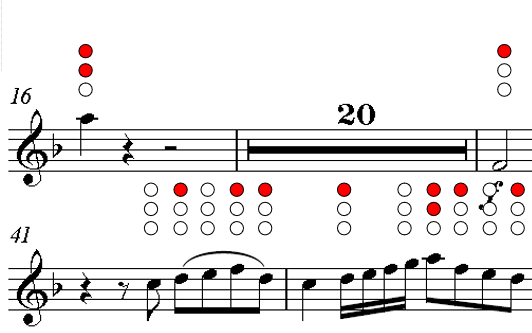
As you progress through the piece, you can place fewer and fewer fingerings so that you or the student is forced to learn or memorize.
Using the Trumpet Valve Fingerings Visio Shape
The shape I came up with is super easy to use. You just drop it on the page and type the numbers of the valves that should be pressed:
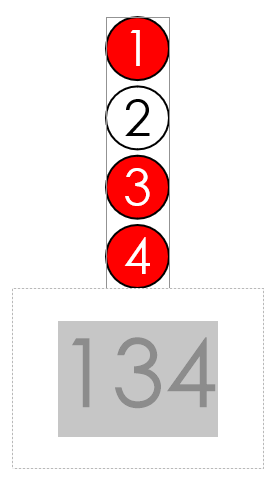
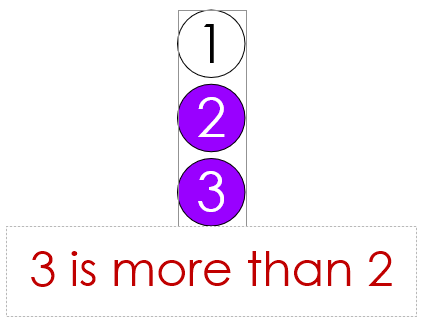
The text that you type is not visible, once you are finished editing the shape. To show Open or No Valves Pressed, just clear the text. Note that the text doesn’t have to be entered in any order. If the valve number is present, then it will be activated. Here is an extreme example of a way to turn on valves 2 and 3:
 You can edit the text in a number of ways, including:
- Select the shape and type
- Double-click the shape and edit the existing text. This is the easiest way to clear the text for the Open configuration, since you can’t select a shape and press Backspace–the one exception to “select and type”.
- Select the shape and press F2
- Select the shape and use the Text Tool (in the Ribbon under: Home > Tools > Text)
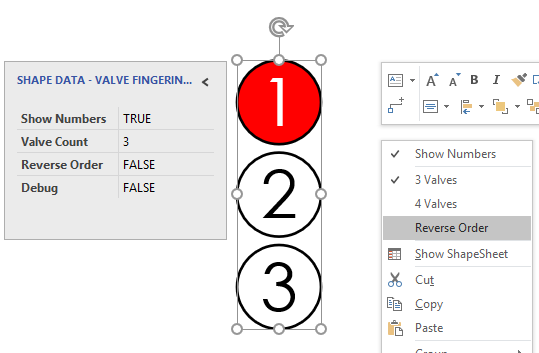
The shape has a few options. You can choose to show or hide numbers on the valves, and you can choose to show 3 or 4 valves, and you can choose to reverse the order.
I originally created a shape that number 1 at the bottom, 3 or 4 at the top, because when you hold a trumpet and look down at the valves, that is what it looks like. But there seems to be a standard that numbers the valves from top down. I still think my way is better–at least for trumpeting!
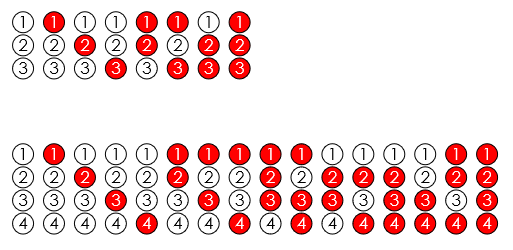
If you are (also) a programmer, you will appreciate the binary tie-in. Three valves have eight combinations. Four valves have sixteen combinations:
Note for those of you with two layers of tape across the bridge of your glasses:
Trumpet valves open tubes of differing lengths. To open increasing lengths of tubes, you would press valve 2 first, then 1, then 3. So if you’re trying to make sense of this, but don’t have a trumpet handy, try thinking of it this way: The least significant bit is (valve) 2, then 1, then 3. That means the fingerings don’t seem to follow a logical order when you play a scale.
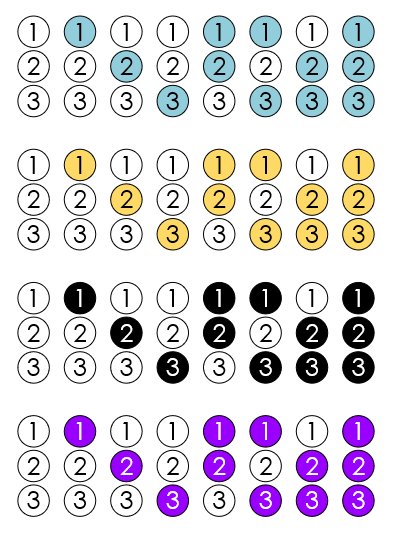
You can change the “pressed” color by simply changing the fill color of the shape. You can’t change the open color, though. That remains white. Note that the text will automatically determine the darkness of the fill and toggle between black and white so that it remains readable! This was done using the Make Your Text Stand Out! technique.
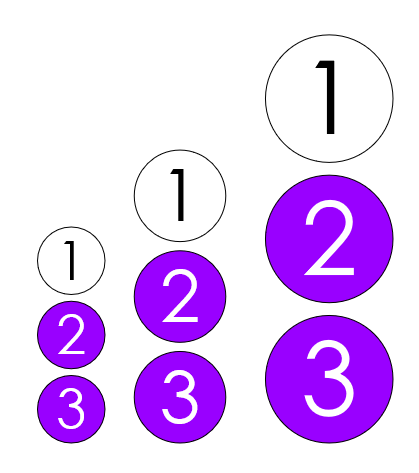
If you resize the shape, the valve text will grow automatically:
For rapidly placing lots of these shapes on a page, I like to use a few keyboard modifiers.
Here’s a simple workflow:
- Select an existing VF (valve fingerings) shape, or drag one from the Document Stencil.
- Hold down Ctrl + Shift while left-button-dragging the shape to the right.
- Ctrl causes a duplicate of the shape to be dragged “out” of the selected shape
- Shift constrains the placement of the copy to be purely horizontal (or vertical). This keeps things nice and tidy.
- Press F4 repeatedly to create more duplicates with the same offset as the first copy. F4 replays the last action, similar to Ctrl + Y.
Importing Music Notation Images
Visio can incorporate images into drawings and diagrams. You can import from files on your disk or in cloud services such as Dropbox or OneDrive, or just cut and paste. Sometimes you can even drag and drop from your browser.
Since a lot of sheet music is available in PDF form, you might need to grab a screenshot of the portion of music that you want to annotate. Rather than use the PrtScn button (which seems to be disappearing from modern laptops), you’ll want to use screen capture software. I use the Snip app from Microsoft Garage.

If you use OneNote, there is a button that you can use. In OneNote, look under Insert > Images > Screen Clipping.
Once you’ve snipped a portion of the screen, simply copy the picture and paste it into Visio. Send it to back [Ctrl + Shift + B], then add it to a new layer. I usually name this layer Images or Photos or Bitmaps. Whatever I name it, I immediately lock the layer so that I don’t accidentally select the image and move it or delete it.
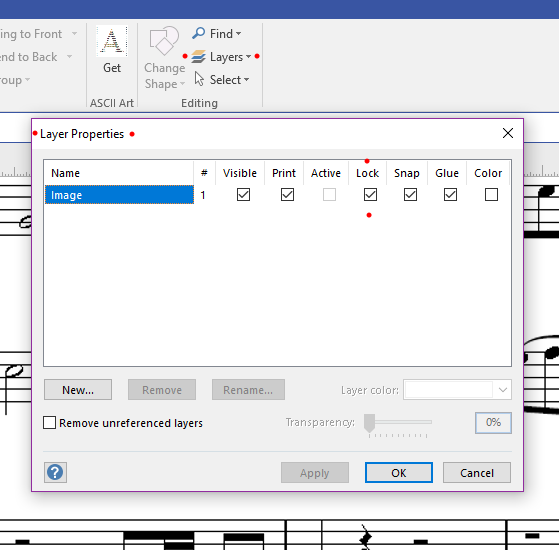
Layer Properties dialog displaying the locked “Image” layer
Errata
While we’re talking computers and music, I’ll take this opportunity to post a picture I drew on my 12.9″ iPad Pro, using AutoDesk Sketchbook. It shows the relationship of trombone slide positions to trumpet valve fingerings:
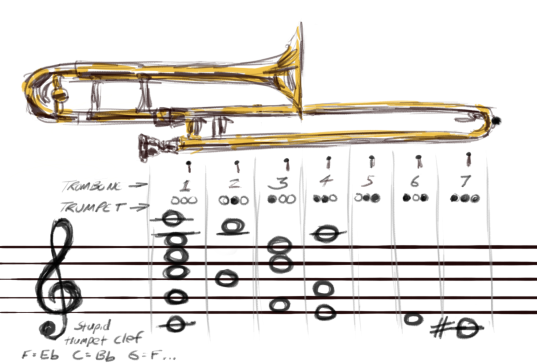
Trombonists convert the three trumpet bits to a single number
In order to learn the fingerings, I figured I would take an AI approach and bombard myself with practice. Since trumpets are really, really loud, I figured simulation would be my best bet. So I popped in to the Google Play store and settled on the free BrassUp! app. It’s logo kind of looks like my new horn:
It has enough useful options, such as choosing the range of notes to practice, fingering a horn with 3 or 4 valves, screen layout of the valves, quizzing via random notes, scales or exercises, and more.
You can even (kind of) hold your phone like a trumpet and press the valves as the notes appear on the screen:
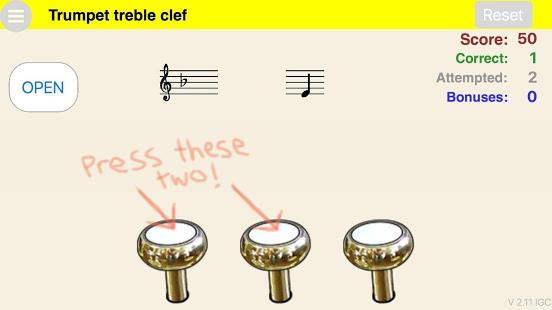
I just did this for five or ten minutes per day until I could play 2 octave’s worth of notes without thinking about it.
What’s in the Download
When you download the file, you’ll find the Valve Fingerings master in the Document Stencil. The main page in the document is loaded with demonstrations and helpful notes, but be sure to check out the second page in the document, which is the same as the first, but without all the notes. It’s a great place to play, experiment and learn.
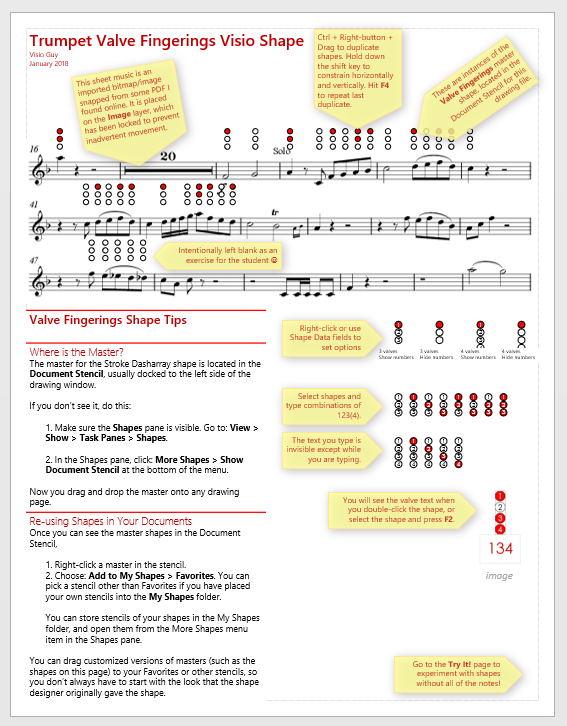
Download “Trumpet Valve Fingerings Visio Shape”
s!Aj0wJuswNyXlhFHHVhH3Zaexc-WR – Downloaded 2885 times – 103.00 B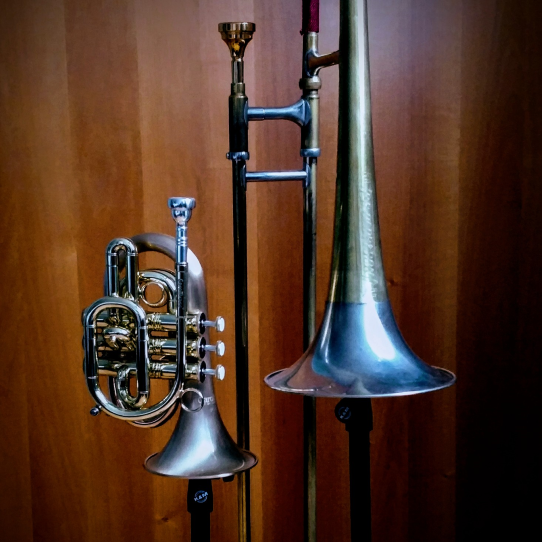
Digital and analog: one for each half of your personality brain

Leave a Reply