 If you’ve ever wondered how to convert text to paths or vectors in Visio, then this article is for you–although the solution might not be what you expected!
There are many reasons you might want this. First, by having text “as paths”, you essentially convert characters into shapes. Shapes that resize like any other graphic. If the text on your shape is really part of the graphic, like in a STOP sign, then text as paths is a good idea, because in Visio, getting text to change font size as the shape shrinks and grows can be a bit of a chore (see: Text Resizing with ShapeSheet Formulas)
Another big reason is that when you are creating graphics, sometimes you need the outlines of text characters.
A font typically has just one color and no outline, and might not contrast against a busy background very well. Being able to choose different effects for the outline and the fill will help the text stand out. Maybe you want to create a watermark that consists of a thin outline of the text. Or maybe you just want to fill a letter with a tiger print, like in the thumbnail for this article. That fill was done by hand with ink pens, but being able to print out just the outline for the Cooper Black font characters was really useful. Drawing text characters is difficult and boring, but coloring them in is really fun!
Visio doesn’t have a feature for “converting text to paths” as users of graphic-arts software are accustomed to calling it, but I’ve found a fairly simple way to get it done. Use Inkscape: ” a professional vector graphics editor for Windows, Mac OS X and Linux. It’s free and open source.an open source illustration package.”
You don’t have to buy anything, or install any crap/spy-ware, but you do need to install Inkscape and use it very briefly.
I wanted to point this out early in the article, because I’ve watched countless video on How to Do Something, only to find out that you need to jailbreak your iPad, or install some dubious point of software. This is always often let down, and considered Not a Solution in many cases. In this case, the ease of using Inkscape to make text outlines in Visio is well worth the installation, in my opinion.
If you don’t want to install Inkscape, then this article might not be for you. For the rest of you…
The Short Version
If you don’t feel like reading the whole story, and are quite good with computers and Visio, here is how to convert text to paths in Visio:
- Type your text in Inkscape (get Inkscape, learn more about it)
- Format the font and style of the text
- Use Path > Object to path to create vectors out of the text
- Copy the text and paste it into Visio
- Ungroup (Ctrl + Shift + U) the text in Visio, because it comes in grouped together
You can now style the line and fill attributes of each letter independently. You can stretch and squish the letters like normal shapes. You can even Fragment and Combine them using Visio’s Boolean Operations. Have fun.
For the rest of you who like a bit more than just a bullet list…well here’s some more reading and a few more bullet lists! So go go grab a fresh double soy-latte mocha frappociattocini with room, sit back in the comfy sofa near the window, and enjoy the whole story and motivation behind today’s project. And if your not careful, you may learn something!
The Problem
I’ve wanted to write about text-to-paths in Visio for quite some time, but my methodology took several years to evolve to the point where I thought it was simple enough to share. Plus, I wanted to have a story to tell, to make the article more interesting, and to anchor the points to something more concrete.
This morning, I was sitting on the bed, and I looked up at the storage boxes sitting atop our closet. They are numbered with bright hunting-orange post-its:
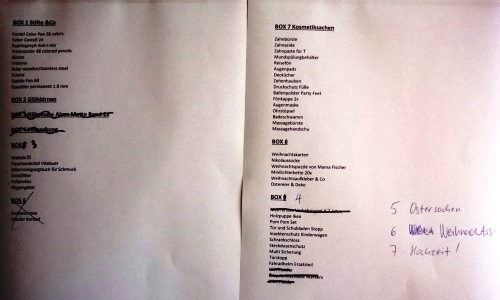
 Since it is quite an investment for our family’s shorter members to get a box down from up there, my wife has even created content lists to make box retrieval more efficient and accurate:
(Wife is looking on in horror at my screen; “There might be errors in that list!” “Don’t worry, honey. There’s no ‘click to view larger image’ on this one.”)
But the orange post-its lack that personal touch. Too utilitarian for our bedroom, and I didn’t like them. So I got the idea to print out number-outlines and color them in. A nice project to do with the kid on a rainy day.
I’ve done this a few times before: First, for the letters of my daughter’s name (which is where the orange “T” above comes from), and also for a set of beer-coaster-sized numbers and letters for our child to play and learn with.
So the goal was this: get nice, thick, black number outlines for the font of our choosing, but with no fill, so that me and the kid could decorate them.
Methodology
Essentially we create the text in Inkscape, which is the open-source equivalent of Adobe Illustrator. Inkscape creates files in SVG format. I used to create the text in Inkscape, then convert it to paths, save the SVG file, then import the SVG file into Visio.
But it’s simpler then that. After you convert the text in Inkscape, you can copy the object, and paste it into Visio. With just a few steps of massaging, you’ll have fully-editable geometry, that you can decorate with independent line- and fill styles.
Create Text as Graphical Paths
- Install Inkscape
- Start a new Inkscape drawing
- Get the text tool, or the Create and edit text objects tool by clicking the big A icon in the toolbar, or pressing F8
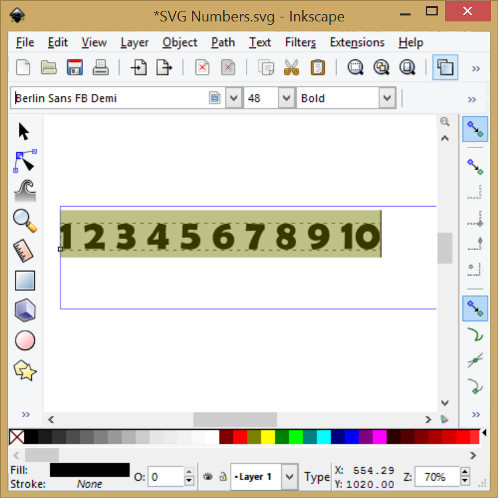
- Click in the drawing and type the text you want:
-
Double-click the text to select it all, then choose the font, font-style and size of your liking
-
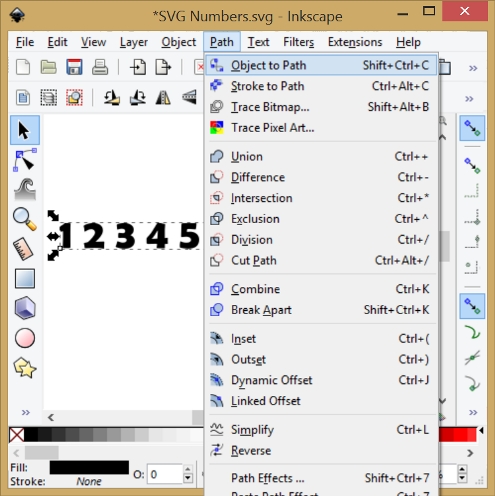
Convert that text to paths using the menu: Path > Object to Path. You should no longer be able to select the text with the text tool, because it is now “graphics”:
- Switch back to the pointer tool (F1)
- Copy and paste the text-path object into Visio
Take it to Visio
- Paste the Inkscape text-path object into a Visio drawing page
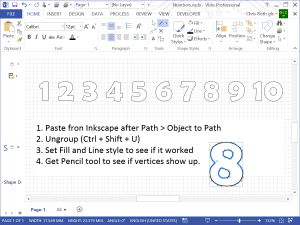
- Ungroup the imported object (Ctrl + Shift + U)
- Verify that the characters are indeed Visio geometry:
- Set the line color and fill color. They should be independent–something that is not possible with normal Visio text.
- Stretch or squish a character. This is also not possible with normal Visio text objects.
- Get the pencil tool and select a shape. You should see individual vertices and curve points:
Create Containers for the Numbers
To finish up, I needed to do some styling, and put the numbers into containers.
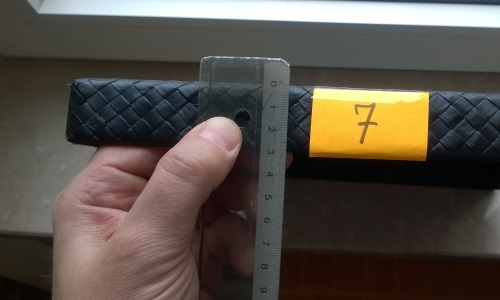
First, I measured the space available for each number. A vertical height of 30 mm was available for the box lids:
In Visio, I created rounded rectangles that were 25 mm high. You can draw a rectangle and watch the status bar in the lower-left corner as you drag to see how big the rectangle is.
If you want to change, you can drag a handle, or just click the Width, Height or Angle in the status bar to pop up the Size & Position dialog, which will let you precisely set the dimensions of selected shapes.
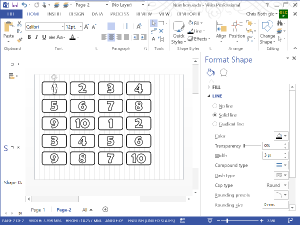
I then Ctrl + Dragged and F4-ed (duplicated and repeated last action) my way to a nice array of boxes, sent them to back, and used Visio’s alignment functions to center a number over each rectangle:
Since The Kid was involved, we made a couple of copies in case we wanted to try out different designs. To make scissor-work and coloring easier, we set a nice, thick 3pt border for both the boxes and the numbers.
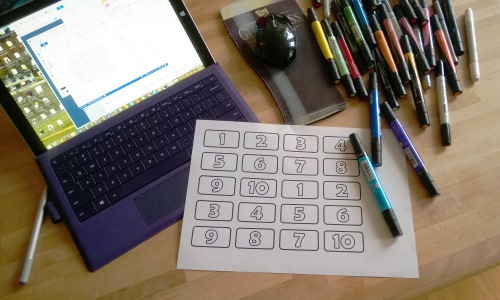
With the Visio work done, it was time to print, then get out the markers!
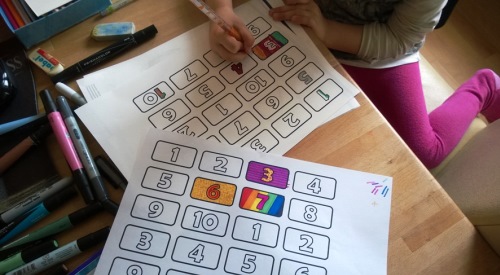
Now our storage boxes have a personal touch, and the FLUORESCENT ORANGE is gone:
And when we look up at the closet, we see a splash of color, and can think back with smiles on the fun we had on a cold and rainy March 1st:
Epilogue
If you have Visio installed, you probably also have Microsoft Office on your PC. You can use Word Art objects from the other office Apps to create outline text. You can then copy the object, paste it into Visio, then ungroup it to get vectors. But the result can be jaggy. It’s been getting better over the years, but the resulting Visio shapes have a lot of points, and aren’t always so smooth.
I used to copy and paste from Macromedia Flash, and that was horrible. The resulting letter-shapes looked like they were created for the Atari 2600 and had serious jaggy issues.
So Word Art might get you close enough if you’re in a pinch and don’t want to install Inkscape.
However, if you do any other work with SVG or Visio and SVG, it can be handy to have Inkscape lying around. For instance, sometimes I grab artwork off of Wikipedia that is in SVG format. It doesn’t always import correctly into Visio, or import at all. I can sometimes open the file in Inkscape, re-save, then import it successfully into Visio and continue working.


Great to see Inkscape use highlighted. This is a seriously capable package. I wasn’t aware that there were such issues in generating quality outlines for use in Visio so it’s nice to see how such software can be of use.
Along with GIMP and Scribus I always install Inkscape on any of my PCs. They are arguably as good as many commercial offerings and they are genuinely free on multiple platforms, including Windows.
…of course the only type of “graphical” program without a competent free GPL alternative is VISIO. I’ve tried alternatives but not found a match for the breadth of capabilities of this diagramming tool.
True Libreoffice Draw can import simpler Visio drawings but it can’t export or round trip them.
Thanks for sharing, Rick!
That’s a great article, Rick. Thanks. Instead of installing Inkscape, I was able to use Lucid Chart’s web app to do the same thing (had to export SVG and import that in Visio, but it gave me each letter as a shape).
Hi, So pleased to find this info and I thought I had the answer to my problem… However… I am using the current version of Visio (2108) and i can’t paste from Inkscape. I can drop the selected curves into Word even, but not Visio. Has this ability been deprecated in Visio?
I’ve done some testing and found that Inkscape 1.0 and 1.1 seem to have changed what they copy to the clipboard, and Visio can not read it. I’ve even submitted an issue to the Inkscape people:
Workaround
Just save the file that you’ve created in Inkscape. Drag that file into Visio, and you’ll get the svg-data converted to useful Visio stuff. You’ll just have to copy it from the “Inkscape drawing” to the actual Visio drawing you’re working on.
Great workaround… thank you 🙂