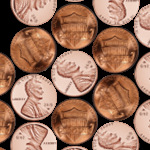
 I’ve created a few Visio SmartShapes that can be easily snapped and glued into hexagonal patterns! Check it out!
I’ve heard of penny floors before–where people cover their floors with pennies instead of tiles. But I always thought they just placed the coins randomly on the floor, then covered them with epoxy resin.
Today I searched for examples to show my daughter, and was surprised to see that folks are actually creating intricate patterns using the varying degrees of penny oxidation!
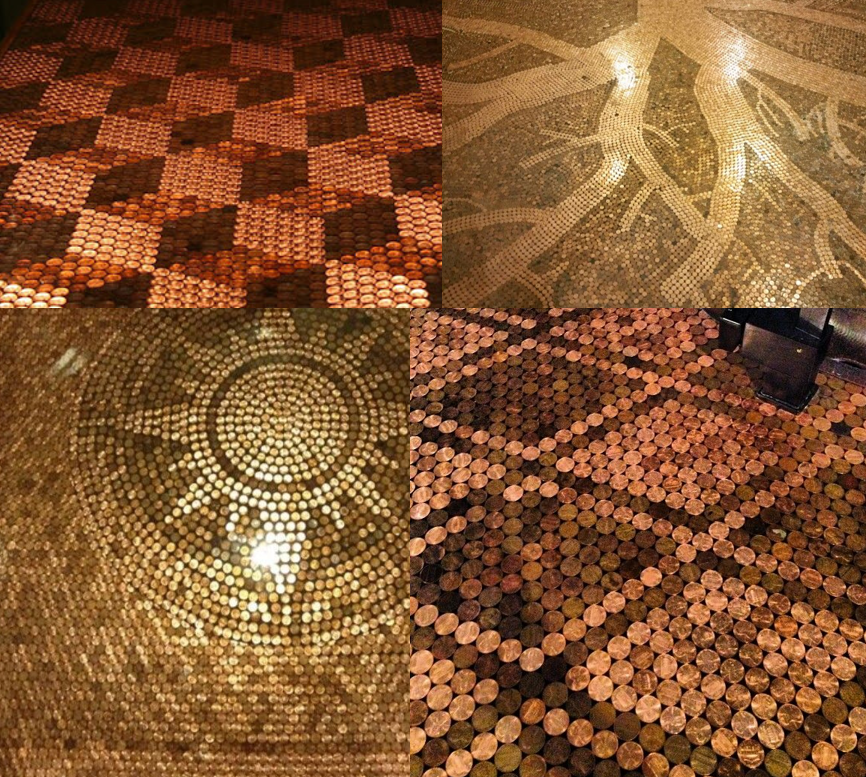
I got to thinking about how to design these patterns without getting rolls from the bank, and getting down on the floor. This traing of thought, of course, led me to Visio, and the question: how to align shapes in hexagonal patterns?
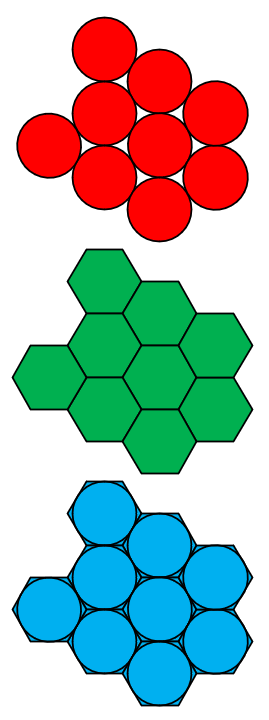
In nature, when circles are placed tightly against each other, they form a hexagonal pattern. That’s exactly what’s going on with these pennies!
In Visio, it is easy enough to arrange shapes orthogonally, but not hexagonally. However, there’s a Visio feature called 2D Glue which can be used to make this happen. It uses specially-typed connection points that can attach to each other, and rotate their shapes to preassigned angles.
Circle and Hexagon Multi-shape
So I whipped out my copy of Microsoft® Visio® Online Plan 2 MSO (yes, that was sarcastic) and developed a shape that can:
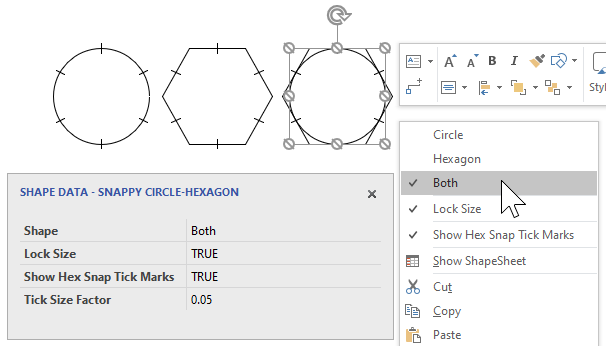
- Take three forms: circle, hexagon, and both:
2. Snap and glue together in hexagonalish ways, using 2D snap & glue:
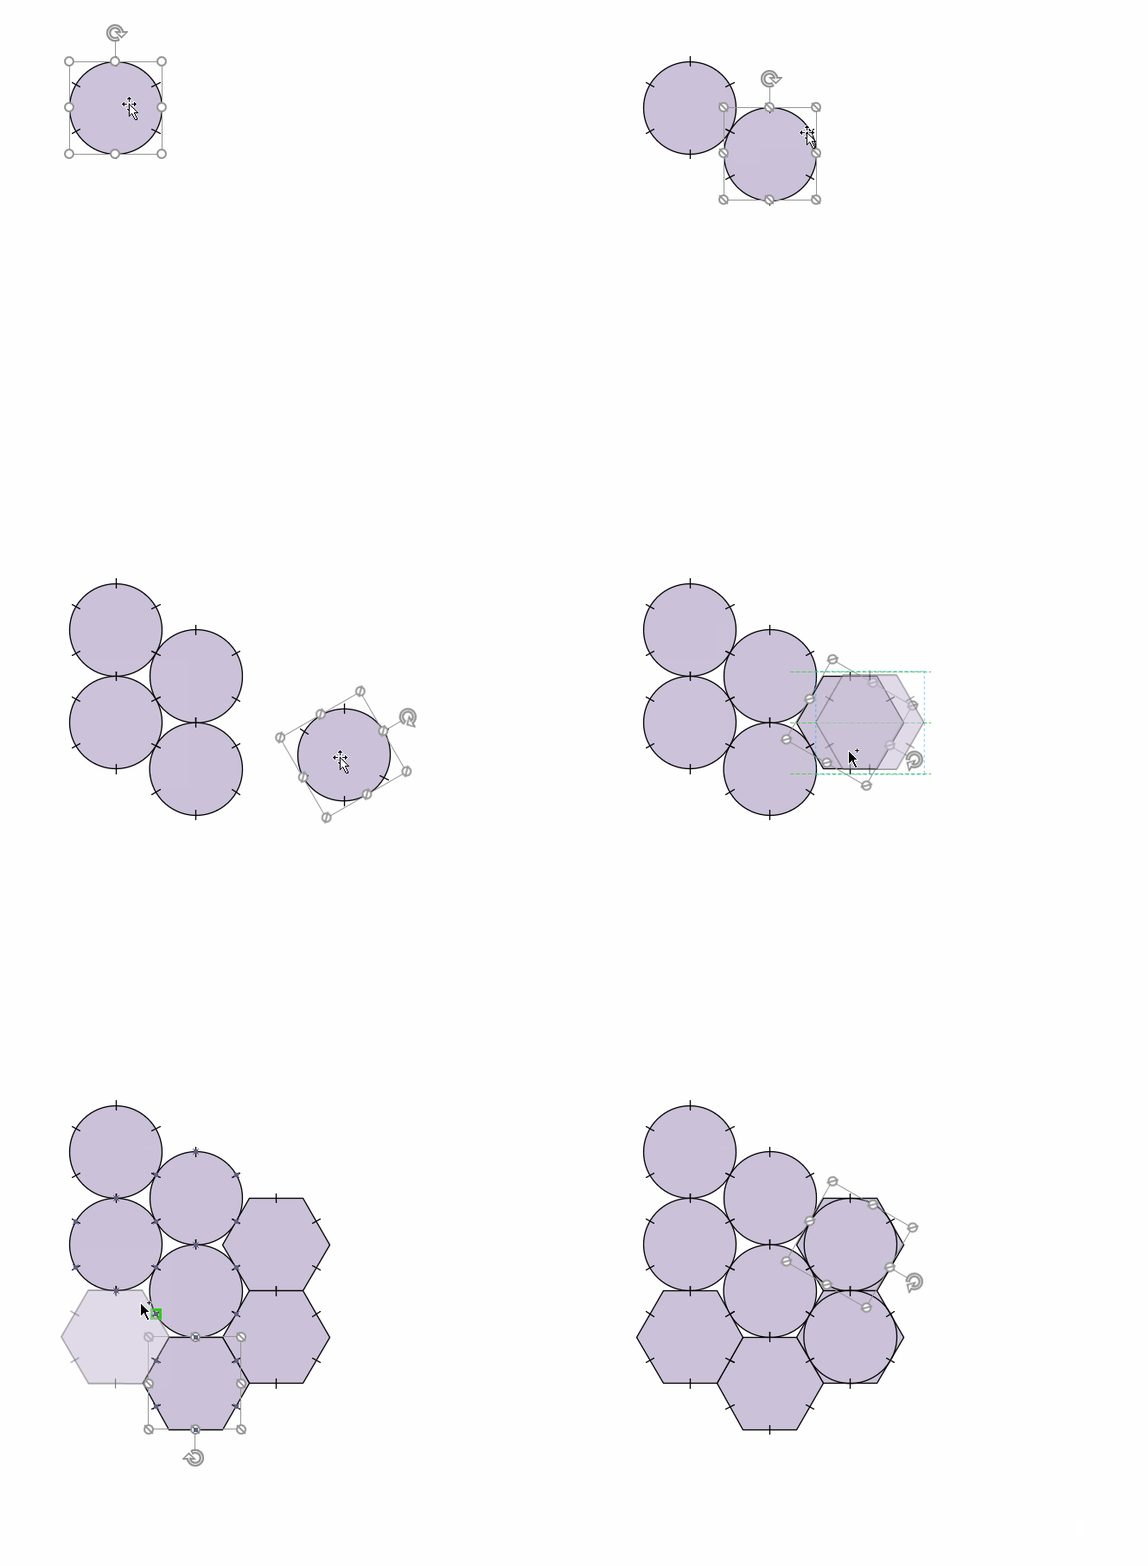
That’s pretty useful in and of itself. Not only can you arrange shapes in a way that isn’t inherently easy, but you can also make circles of a few different shades of brown, then plan out a penny floor!
I’m not exactly sure what folks will need these shapes for, but I can imagine they’ll be quite useful. If nothing else, you can make your own hex graph paper for mapping or gaming. Let me know what you come up with in the comments below!
Hex-snapping Penny Shape
Making bland circles with flat shades of brown was too uninspiring for my mood, so I went a step further. I applied the techniques from the article on film-strip shapes and built a Multi Penny Shape, which includes five different penny images of varying shades.
Again, it’s a single shape, but it can take on five different personalities. Just right-click or use the Face Shape Data field to change it:

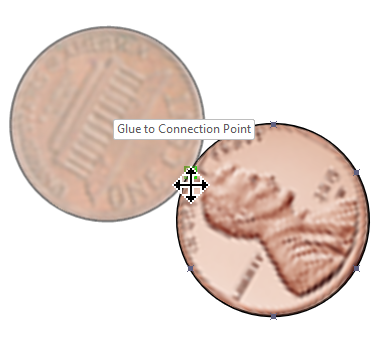
Here’s a close-up action shot of of Abe Light snapping to Monument:
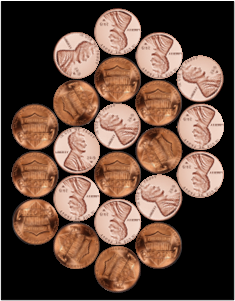
A few minutes later, you’ve got something like this:
Options
The shapes are pretty easy to use, once you know how. But I’ve crammed a few features into them that need some explaining.
Master Shapes
The sample document that you can download at the end of this article contains three shapes, which you should find in the Document Stencil:
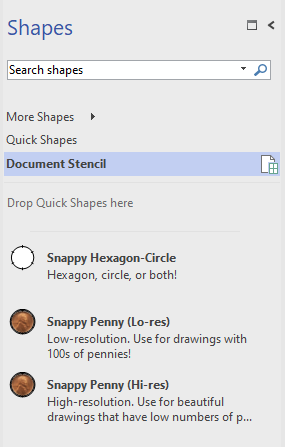
You’ve already seen them demonstrated above. The main thing to keep in mind is that the Lo-res Snappy Penny is the best choice if you plan to make a drawing with hundreds of penny shapes. If you just need to snap a few, really good-looking pennies together, use the Hi-res version.
Shape Data and Context Menu
As usual, you can access many of the shape’s options via the right-click context menu, and through the Shape Data panel:
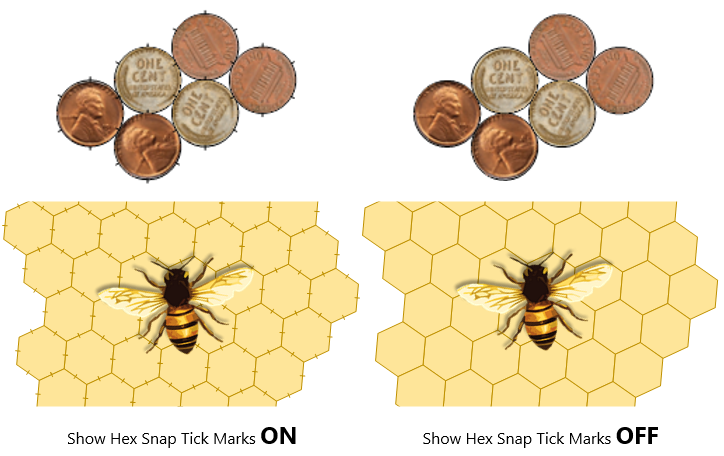
Hex Snap Tick Marks
Each shape has six snap points, which use Visio’s Connection Points to get the snapping and rotation to happen. Since Microsoft screwed up several versions ago and made connection points really hard to see, I’ve added tick marks on top of the connection points.
The reason you need to know where the connection points are, is that 2D gluing works best when you grab a shape near the connection point that you intend to use for snapping/rotation.
If you can’t see the points, then you won’t know where to grab the shape, and the snapping operation will be thoroughly frustrating. Especially since each of these shapes have six snap points. If you grab the shape in the middle, the experience is more startling than if you grab the shape near a specific snap point.
Once you’re done, just right-click any of the shapes and uncheck Show Hex Snap Tick Marks. This will turn off all of the tick marks on the page:
Snap and Glue Settings
The primary utility of 2D glue is that it not only jams one shape up against another, but it also rotates the shape-being-dragged into position (if the connection points are built properly).
In my opinion, that snapping behavior is the most important. The fact that shapes glue together is nice, but because one shape glues to another, you end up with a sort of “mystery chain” where shapes are glued to each other in some order, but it is unclear which shape is the leader, and which shapes are the followers. Also, in older versions of Visio, the glue-chain breaks down at a certain number of glues, but I haven’t seen it in Visio 2019. Finally, 2D glue can break if you group and ungroup shapes, and sometimes if you resize shapes.
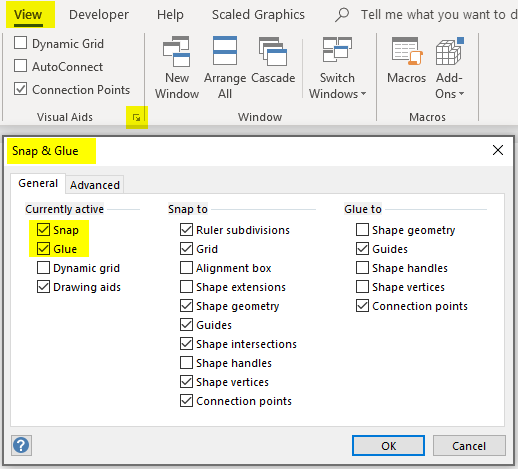
So you can turn off glue while you are working with these shapes, but it’s not necessary. What is necessary is to have snap turned on. You can be sure of this via View > Visual Aids > Dialog box launcher:
Random Pennies
One last feature and visual aid that I should mention: you can have the five penny faces set to randomly select. If you right-click a penny shape and check Random on Double-click or Drop, then you will get a random face when you duplicate the shape (e.g. via copy-paste, or Ctrl + Drag, or Ctrl + D duplication). You can also double-click a so-configured penny shape to select a fresh face.
If the tick marks for the page are on, you will see the ticks around the penny shape, plus an offset circle. This is to help you know which shapes can be double-clicked to get a random face:
Get the Hex Snap and Glue Pennies!
Download “Hex Snap & Glue Shapes”
s!Aj0wJuswNyXlh1Rwk91dsOrfOQMc – Downloaded 13947 times –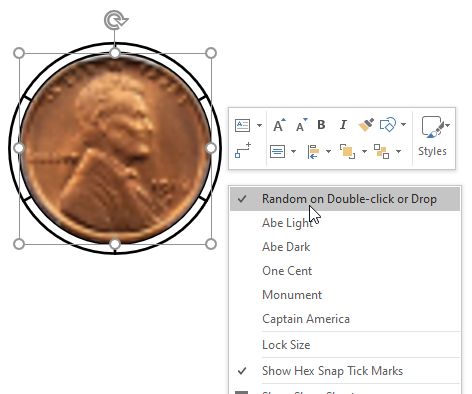

Thank you for posting hexshapes! I’m planning out a Nanoleaf LED light panel display and smart hexes are perfect… but showing how the how too smart connectors was even more helpful…. Something I’d not been able to quite work out by fiddling… thank you!
Thanks for the feedback! It’s really, really nice to hear that people are getting good use out of the random stuff I create!