 Visio 2010 offers several new features to streamline flowcharting and business process diagramming.
One of these features automatically shifts shapes out of the way when you add a step in the middle of a flow!
If you’ve used older versions of Visio, you’ll know that inserting a step in the middle of a process requires a number of steps. Move downstream shapes out of the way. Disconnect a connector. Drop a new shape. Connect the old connector to the new shape. Connect the new shape to the rest of the flow. Phew! If you have to do this over and over, it gets tedious.
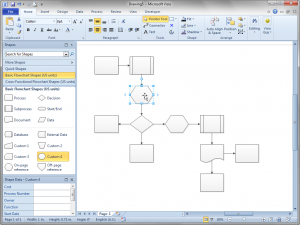
Visio 2010 helps out a lot in that it detects shape insertion and automatically shifts all the downstream shapes for you. While it’s best viewed live, in the video that accompanies this article, here’s a static view of how it happens.
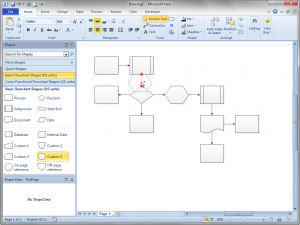
You drag a new shape over an existing connector–the place at which you wish to insert a new step. Both ends of the connector turn bright red to indicate that you are inserting a step and splitting the connection:
When you let go of the shape, Visio splits the connector so the new shape has incoming and outgoing shapes. It also shifts all of the downstream shapes out of the way.
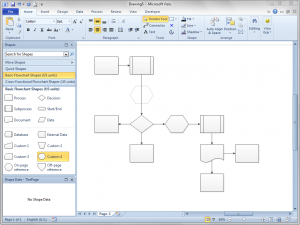
Visio also helps when you delete shapes. Here the shape we just added has been deleted. See how the connection automatically heals? Two connectors plus a shape become one connector that spans the gap. Visio 2010 doesn’t automatically collapse the flowchart, though. It only expands when new shapes are added.
For some people, the new features might cause problems. This often happens when a custom Visio-based solution is in use that doesn’t expect any of the new behavior, since it didn’t exist when the solution was programmed.
If you go to File > Options > Advanced. In the Editing Options section, you’ll see three check boxes that let you switch connection options on and off:
- Enable connector splitting
- Delete connectors when deleting shapes
- Enable AutoConnect
The auto-shifting feature is available in all three editions of Visio 2010: Standard, Professional and Premium.
If you like Visio 2010 articles like this, and instructional videos, be sure to check out my new book, which comes with an online version that includes an electronic version of the book, plus videos and audio clips that enhance your learning experience!
 See also:


Hello,
How do you autonumber shapes in Visio 2010?
Hi Kendall,
Took me a while, but I found it!
View Tab
> Macros > Add-Ons > Visio Extras > Number Shapes
I have Visio 2010 and am trying to use this feature but all I get are the blue arrows — no red arrows. This would be very helpful — is there something I’m not doing?
I am using Microsoft Visio as a COM object in my C# application. I want to auto arrange shapes on a Visio page. What should I code for this task? The shapes are database entities.
userView.Shapes.SomeMethod();
userView is name of COM object but what should SomeMethod be?
Hi Wasif,
Try using the Layout method on a selection or a page.
Ie:
visPg.Layout;
visApp.ActiveWindow.Selection.Layout;
Hello,
wHich shape should I use for EDI/API message? (electronic data interchange/application program interface)
Thanks,
Marta
Hi, I am unable to insert a custom swimlane into my CFF. If I drag over the standard swimlane, it inserts easily, shifting down the others. However, when I try this with the custom swimlane I created, it sits on top of everything. When I try the standard swimlane, the orange connector bar appears before I drop it. When I drag the custom swimlane over, I only get a green connector bar before I drop it. I would like to be able to insert my custom swimlane in between swimlanes so that it shifts them down when it’s inserted, just like the standard one does.