 Did you know that Visio allows you to select shapes inside of groups and manipulate them without ungrouping or opening new windows?
The feature is convenient and powerful, but the visual cues that tell you what you are doing are subtle and can lead to confusion. This article will show you what to look for when working with selections, help you to be more proficient in your diagramming, and save you frustration along the way!
Visio Guy has a lot of articles about advanced topics: programming, developing SmartShapes using ShapeSheet techniques, and other esoteric topics.
But many of you just want to use Visio effectively and get the most diagram for your time and effort. For that reason, I’m going to do my best to fill up the new Visio Essentials category with basic how-to tips, tricks and advice.
Basic Shape Selecting
So let’s create a grouped Visio shape, and take a look at the different types of selection handles as we go.
A group needs more than one shape, so we’ve already draw two boxes. When we click on the first one, it becomes selected with the familiar green handles:
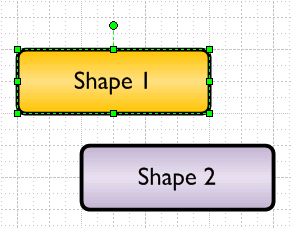
No mystery there! But since we want to create a group, we need to select both shapes. We can do that by drawing a “net selection” around both of them:
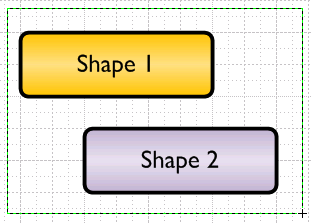
Or by holding the Shift key and clicking each shape individually.
Primary Selection vs. Secondary Selection
Once we have both shapes selected, we’ll see a combination of green handles surrounding the entire set, and magenta highlights indicating each individual member of the selection:
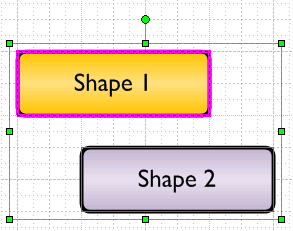
You might notice that Shape 1 has a thicker magenta outline than Shape 2. This denotes the Primary Selection. The primary selection is the first shape in the selection. If we multi-select using the Shift+click method, it will be the first shape we chose. If we use the net selection method, it appears to be the left-most shape (although I am not 100% sure about this.)
What’s interesting about the primary selection is that if we just start typing with multiple shapes selected, the primary selected shape will receive the text.
The primary selection is also the key when using the Format Painter ![]() tool. All secondary-selected shapes will receive the formatting of the primary selection.
tool. All secondary-selected shapes will receive the formatting of the primary selection.
Grouping Shapes and Sub-selecting Sub-shapes
With two shapes selected, we can now create a group. Easy ways group shapes together include: Ctrl+G, and selecting the Shape > Grouping > Group menu item.
After grouping, our shape (and its handles) look like this:
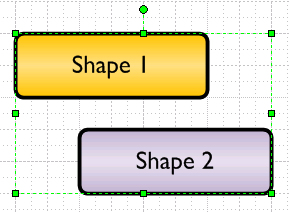
The green handles surround the entire shape, and you can now move both shapes together as a single unit. Shape 1 and Shape 2 are now Sub-shapes or members of the group.
But both shapes have different text and formatting, which you or a friend might want to change in the future. For this reason, Visio allows you to sub-select shapes inside of groups.
If you first select your group, then click again on one of the sub-shapes, you’ll notice familiar, yet different, green handles:
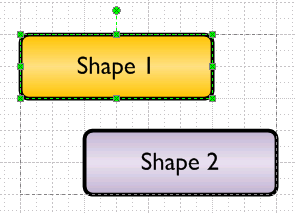
See how they are slightly lighter in color, and contain little Xs?
Notice also that there is a dashed line around the entire group. This is how Visio visually informs you that you have sub-selected a shape inside of a group. With Shape 1 sub-selected, we can now edit its text, and change its line and fill formatting. Shape 2 will be unaffected.
Moving Sub-shapes Accidentally
The danger to new users is that they don’t notice that they’ve (accidentally) sub-selected a shape. They do this, then pull on the shape, and it flies off, outside of the group:
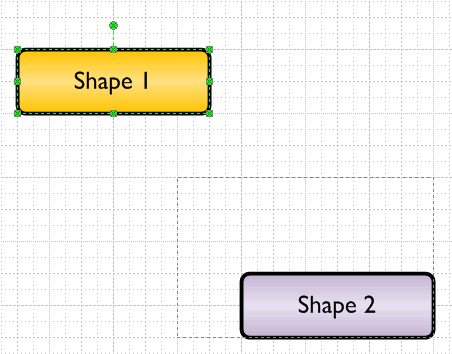
You can see the sub-selection handles, but note the dashed group outline? It hasn’t changed at all.
If we hit Esc or click away from the shapes, then re-select the group, we’ll see something odd indeed!
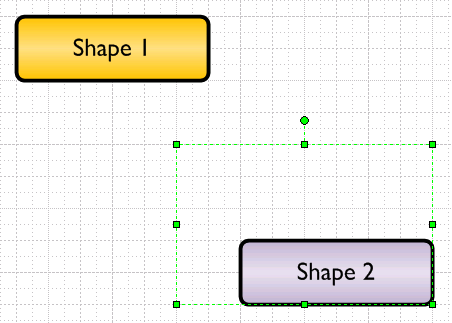
Shape 1 is still “inside” of the group, but it is way outside of the group’s BoundingBox. Sometimes it is desirable to design shapes that have out-of-bounds sub-shapes, but you generally do not want users to be befuddled by this!
One solution to this is to prevent sub-selection altogether. If you go to the Format > Behavior menu, you can choose Group Only from the Selection drop-down:
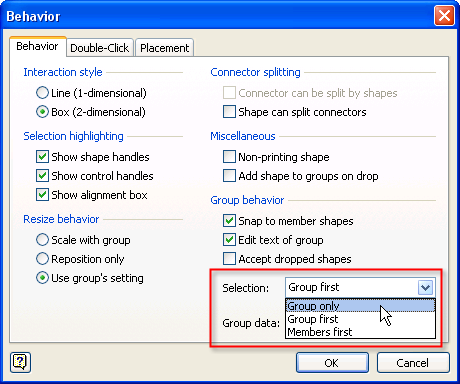
This will make your group behave like a single shape, and users won’t be able to sub-select anything. There are lots of situations where this is desirable.
Note: If you don’t see Behavior under the Format menu, read this: Top 9 Reasons for Turning-on Developer Mode.
Another way is to lock down individual properties of sub-shapes, such as its size and position. Here we’ve sub-selected Shape 1, then gone to the Format > Protection menu:
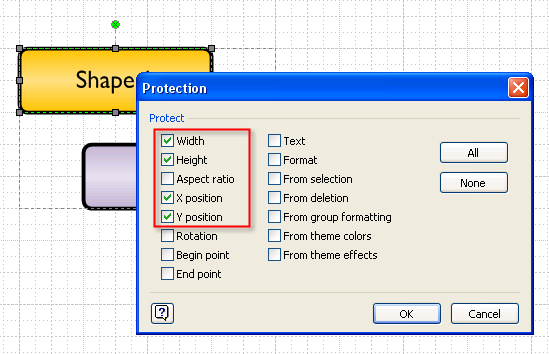
We’ve locked-down the sub-shape’s Width, Height, X position and Y position. Users can still change the formatting and the text of the shape, but they can’t move it. See the dark-gray handles that denote locked attributes.
Sharp eyes might also see that the “lollipop” rotation-handle is still green. Yep, the sub-shape can’t be moved or resized, but it can still be rotated!
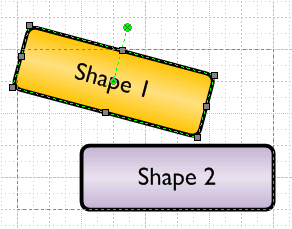
You can learn a lot from a Visio shape handle!
Editing Text
The differences between top-level grouped shapes and sub-shapes can also be seen when editing text.
When we created the new group, we created a new shape. It is important to note that this new group can also hold text. If we select the group and start typing, we’ll see that the group now receives the text:
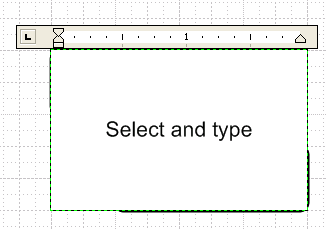
Once we’re done typing (hit Esc or click away from the shape), we’ll see that neither Shape 1 nor Shape 2 received this new text:
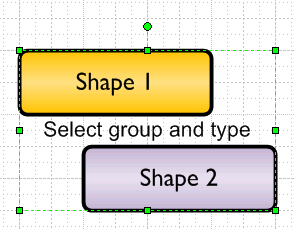
If we want to change the “Shape 1” or “Shape 2” text, then we need to sub-select first. Here we sub-select Shape 1, then start typing:
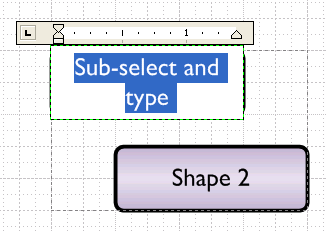
Again, hit Esc when we’re done typing, so we can see what we’ve done more clearly:
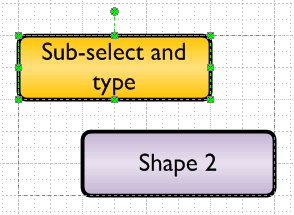
If we don’t want the group to have a text block, there is a way to turn it off. Go to Format > Behavior, and uncheck Edit text of group:
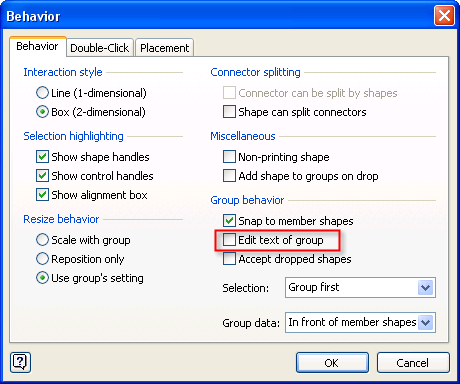
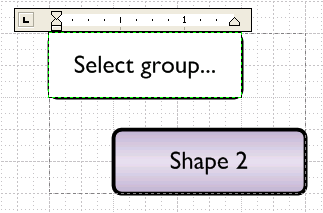
This will disable text at the group level, and the front-most sub-shape will then accept the text, even when we have the group selected. Here, we’ve disabled the group’s text-editing, selected just the group and started typing:
You can change the front/back order of shapes by using Ctrl+Shift+F to bring a shape to the front, or by Ctrl+Shift+B to send a shape to the back. These options and more are also available under the Shape > Order menu.
Getting Inside of Groups
If you want to add shapes to groups, or edit their contents in peace, it is nice to know that you can open a separate window to do this. Sub-selection is great for minor tweaks and text-edits, but sometimes you need an isolated canvas to work with.
If this is the case, just select a group and choose: Edit > Open Group.
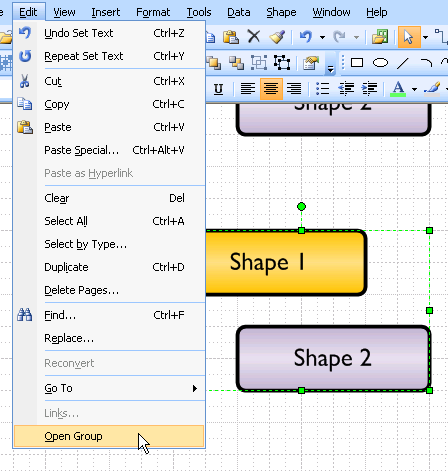
If the shape is an instance of a master, or has been otherwised named, you might see the name of the shape, instead of “Group”. For instance, if you want to peek inside of various network shapes, you might have to pick: Edit > Open Laptop or Edit > Open Monitor from the menu.
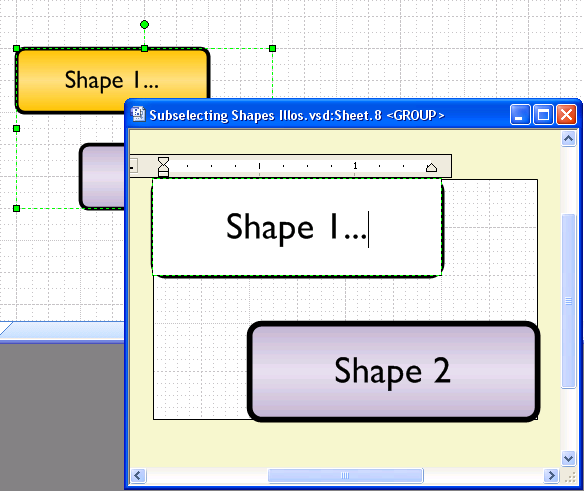
Regardless, you’ll be presented with a new window that has a peach-colored background. You can add, edit and delete shapes inside of this window, just like in a regular Visio drawing window:
There are a few other ways to manipulate groups and their sub-shapes, but I won’t go into details right now. For the curious, try experimenting with these operations:
- Shape > Grouping > Add to Group
- Shape > Grouping > Remove from Group
- Shape > Grouping > Convert to Group
- Shape > Operations > Update Alignment Box
Visio 2010 Handles: Change Coming Soon!
As of this writing, the Visio 2010 beta is in the hands of a few thousand people across the globe. They will have noticed that after eighteen years of those cute little green handles, change is afoot.
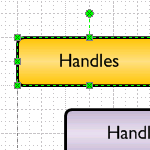
Just a simple selection of s single shape tells us that the colors are changing. We’ll soon be seeing blue handles with fancy gradient-fills in them:
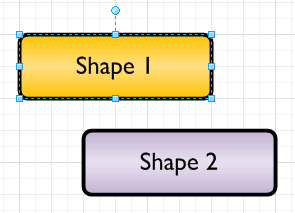
A multiple selection looks the same as before, except that green has changed to blue:
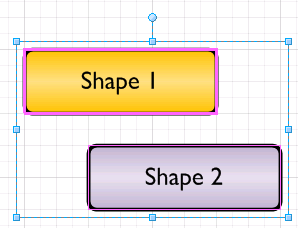
When we group the shape, we get a single selection rectangle, a single set of handles–as expected:
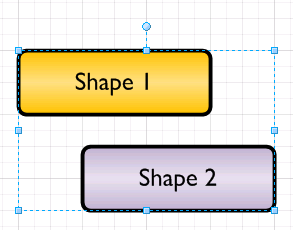
But when we sub-select a sub-shape in Visio 2010, the handles are almost white. There’s just a tad of blue in those handles, and no Xs!
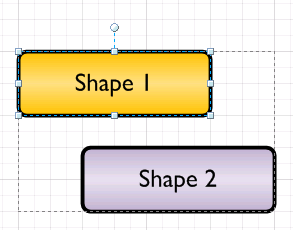
I’ll reserve comment other than to say that this is going to mess up a lot of screenshots in people’s blogs!
Selection for Developers
If you are a developer, you might be interested in further technical information regarding selecting and sub-selecting of Visio shapes via automation. Have a look at: Visio Guy » Detect Sub-selected Shapes Programmatically!

You should mention that the developer of the shape may have added a formula to one of the shapes that may be destroyed if the developer did not properly protect the formula. For instnace, one of the sub shapes may have been defined as being positioned 2 inches to the left of another subshape. Moving the subshape may change the position to be a percentage of the main shape.
Of course, this can be a topic for another one of your blogs. 😉
Hi John,
Thanks for the input. Sounds like food for about five articles, like why you should GUARD formulas on sub-shapes, and other fascinating themes.
I was trying to keep this a “mostly for end-users” article, but I did get carried away anyway, I suppose.
can visio 2007 do some lot plotting like that of a mapdeed draw?
can connectors/ shapes be controlled to a point where you want it to be? visio takes so much memory and space. are there solutions to problems like these?
While it’s great to disable the ability to edit a groups text (as an overlay/underlay of the sub-shapes), is it possible to ‘edit’ the groups text, but actaully change to the text on one of the sub-shapes?
For Example, click on the group, type away, and the text appears/is changed on shape 1 of the group.
Thanks
Wait up, I’ve solved my problem.
1. Enable ‘Edit text of Group’ in the behaviours dialogue.
2. Remove ‘Text’ protection from the gorup.
3. Set the ‘HideText’ cell (in the Miscellaneous group) of the Group to FALSE’.
4. Edit the text of the Shape, right click and select ‘Insert Field…’. Enter the formula (where Sheet.n is your group).
=SHAPETEXT(Sheet.n!TheText)
5. Protect the ‘Text’ of the Shape.
Dan
If you don’t want the group to have text, then you can simulate the behavior in older versions of Visio, where the group couldn’t take text.
In Format > Behavior: Uncheck “Edit text of group”
Now, the top-most sub-shape in the group will take text typed by a user. This is how Visio shapes behaved in Visio 4.0 (I think) and earlier.
As Daniel alludes, any text that reflects data in the group will have to reference the group’s Sheet.ID. So instead of inserting, say, Prop.Cost, you now have to reference Sheet.5!Prop.Cost. If you are using the insert field dialog, you’ll have to use the Custom Formula option, since “Shape Data” will only list fields for the sub-shape, not the group.
Hi,
I would like to be able to rotate grouped shapes in Visio but there’s a catch:
I’d like them to rotate on their own axis and not on the common axis of the group. They must stay where they are but each and every shape should rotate on the spot and all together of course
I would love a solution for this!
Thx
Yves
Hi Yves,
If you have a connected diagram, then Home > Arrange > Position > Rotate Diagram might do want you want. The functions effectively transpose a diagram by 90 degrees. But it doesn’t work if the shapes are connected, like in a flowchart.
Otherwise, use the Size & Position panel to do this:
1. Select several shapes
2. Click on Width or Height in the status bar, lower-left, to bring up Size & Position
3. Edit the value for Angle
This will rotate individual shapes in the selection, not the selection as a whole.
it works like a charm! thank you very much indeed.
Hi there,
I may have been a bit to enthousiastic there…
it DID work when I tried it the first time, and it DOES sometimes but at other times it just doesn’t do anything…
Okay, I got it: I thought the degrees pointed out the rotation relative to the postion of the shape but it isn’t: 0° is horizontal, 180 is upside down.
You can type math in the Size & Position fields. So if you want to rotate 90 degrees clockwise, and the shape is already at 45 deg, you can append “- 90 deg”. I.e.:
Angle = 45 deg
Angle = 45 deg – 90 deg
Hit return and it will work!