 Well folks, it’s snowing here at Visio Guy Headquarters in Munich! So I guess it’s time to start thinking winter after all. And that’s just what this article and download are all about: Winter! Visio and Winter! Visio and Winter and Snowflakes!
So let’s forget about BPM, Org Charts and Network Diagrams for a while, and hark back to the winters of our youth, when we’d busily be folding paper and cutting away triangular bits, in the mad pursuit to decorate our windows with paper snowflakes.
I’ve coddled together a little tutorial that shows you how to use Visio’s Fragment, Union, Combine and Trim functions to create snowflakes — “ just like you did back in kindergarten! And the download contains some Visual Basic for Applications code to help you “do the unfolding” automatically!
Note: if you already know how to Fragment and Combine with Visio, then the tutorial might be a bit remedial for you. Go straight to the download at the bottom of the page and play around! Also, the download contains automation code that creates an entire snowflak from a single wedge. This tutorial shows you how to do it by hand first, then rewards you with an automatic solution.
Make a Wedge
The first step on our journey is to get a wedge from a circle. More specifically, we want 1/12th of a circle. A common “mistake” when making snowflakes by 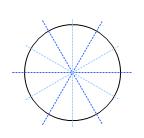 hand is to fold the paper in two, then repeat that two more times. This gives you an eight-pointed snowflake, which looks a bit odd.
A real snowflake has 6 points. So to do this with paper, you’d fold in half, then in thirds, then perhaps once more in half to get 1/12th. This makes really nice looking snowflakes, and that’s what we’ll be doing in Visio today.
First off, we need to draw a circle and two lines, as shown in the illustration below. We’ll use the lines to chop a wedge out of the circle using Visio’s boolean operations.
Of course, you’ll want to rotate one of the lines to 30°. The best way to do this is with the Size & Position dialog. You’ll find it under the View menu. Just select one of your lines, and type “30 deg.” into the Angle field in the dialog.
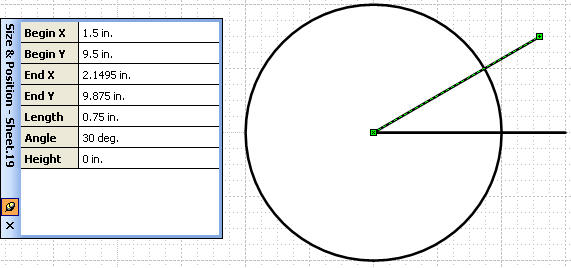
If you’ve drawn your circle and lines to be nice grid-friendly sizes, it should be easy to snap this line to the center of the circle.
Slice and Dice
Now we can cut out the wedge. Simply select all three shapes — the circle and the two lines — and Fragment them. You’ll find this function under Shape > Operations > Fragment. This creates all possible filled shapes from the intersecting lines. Note how excess line-segments are discarded. Fragment only retains closed shapes.
Make a copy of your wedge, then pick the Pencil Tool (or Line Tool or Arc Tool or Freeform Tool) from the Drawing Toolbar. Start hacking away at your snowflake. You can see that I wasn’t very careful in how I chose to cut it up:
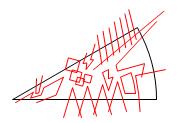
Once you’ve got all your “cuts” drawn, just select the whole mess and do a Fragment once again. Once you’ve got all those pieces, start deleting the ones that you don’t want to be in the finished product.
Re-attach Severed Bits
In all your slicing-and-dicing carelessness, you might have done a bit too much cutting, like I’ve just done. You can see below that I’ve accidentally severed the three red shapes from my snowflake wedge.
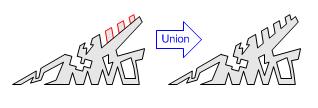
Since we want these bits to be in the finished product, we’ll have to stick them back on the mains. We do this by unioning shapes together. Just select the wayward bits, along with the main wedge and meld them back together by clicking Shape > Operations > Union from the menu.
Put the Wedges Together
Now that we’ve got a wedge, we’ve got to union twelve of them together somehow! But first, let me spoil your reading-pleasure by telling you that the companion download has VBA code that does all of this for you, automagically! But if you want to learn hard-core Visio drawing techniques, then read on…
We’ve got one-twelfth of a snowflake, so let’s take a baby step and create a sixth. The first thing to do is to duplicate your wedge. Ctrl + Drag your wedge to create a copy. Flip it vertically using Ctrl + J, then position it just under the original, as shown:
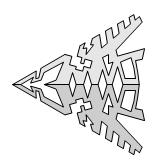
Select both pieces and click our old friend: Shape > Operatons > Union. Presto! You’ve got one sixth of a snowflake!
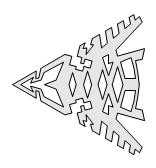
Now on to one-third!
Butterfly: 2 x 1/6 = 1/3!
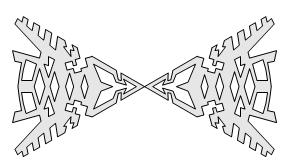
The process to get one-third of the flake is similar to the last step, even if the logic isn’t as clear. For this step, we’re going to horizontally mirror our one-sixth shape and create something that looks like a butterfly.
Simply Ctrl + Drag + Shift a copy of your sixth to the left. The Shift constrains your dragging, and helps you keep the duplicate vertically aligned with the original. You’ll have to flip the new shape horizontally, and Ctrl + H is the quickest way to do this.
After getting them lined up point to point, you can blend your two sixths together by selecting both shapes and executing a Union or a Combine operation. Combine is just under Union in the Shape > Operations menu. It is similar to Union, except that it preserves lines, and line-segments, whereas Union gets rid of lines for shared areas and throws away line segments. Since the two sixths don’t overlap, an have no stray line segments, Union and Combine behave identically for this case. Here’s the result:
The Whole Thing: 3 x 1/3 = 1!
The last step is to make two copies of your strange looking third-of-a-snowflake. Again we’ll employ Ctrl + Drag + Shift to create two copies right on top of the original. The Shift-constraining of our drag-duplicate makes it easy to get the pieces right on top of each other.
After you’ve created your two new thirds, you simply need to rotate them to +60° and -60°, respectively. You should have something that looks like this when you’re done:
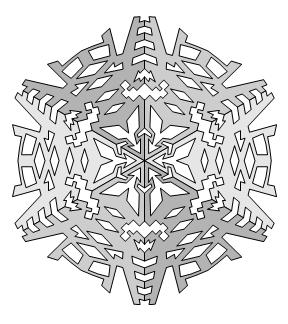
The only remaining step is to select the three shapes and Union them.
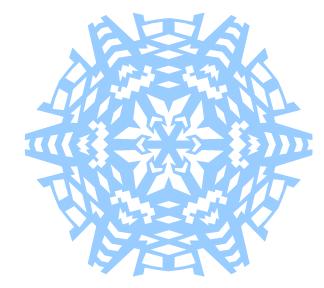
Voila! Here’s your finished snowflake!
Download “Visio Snowflake Generator”
s!Aj0wJuswNyXlhiBUtoCwbCblbw5X – Downloaded 4623 times – 103.00 B
On a related note, there’s an interesting Flash-based snowflake generator here.
Good stuff…
When the last Kalender-sheets
flattern trough the Winterstreets
and Dezemberwind is blowing,
then ist everybody knowing
that it is not allzuweit:
she does come – the Weihnachtszeit.
All the Menschen, Leute, people
flippen out of ihr warm Stueble,
run to Kaufhof, Aldi, Mess,
make Konsum and business.
Kaufen this und jene things
and the Churchturmglocke rings.
Manche holen sich a Tännchen,
when this brennt, they cry “Attention”.
Rufen for the Feuerwehr:
“Please come quick to löschen her!”
Goes the Tännchen off in Rauch,
they are standing on the Schlauch.
In the kitchen of the house
mother makes the Christmasschmaus.
She is working, schufts and bakes
the hit is now her Yoghurtkeks.
And the Opa says als Tester:
“We are killed bis to Silvester”.
Then he fills the last Glas wine –
yes, this is the christmastime!