 You can do some crazy things with Visio’s Dynamic connector…if you know how.
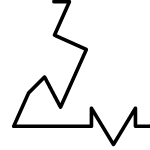
The zig-zaggy image at left is actually one badly-mishandled Dynamic connector, if you can believe it!
So come on in and see just how do wreak such havoc on unsuspecting connectors!
A Visio Guy reader posted a question at the end of Text Along a Connector’s Path in Microsoft Visio 2010, asking:
“How do you get this connector to do the fancy zig-zag paths?”
He was referring to the thumbnail image for that article, which sported a whacko connector, similar to the one above. Here it is for reference:
But that article focused on some nifty smart behavior that keeps text aligned along the path, and never bothered to talk about how you go about screwing up connectors in the first place!
Dynamic Connector Handles
If you select a Dynamic connector shape on the page, you’ll see a bunch of green handles (and maybe some red handles too!). Have a look:
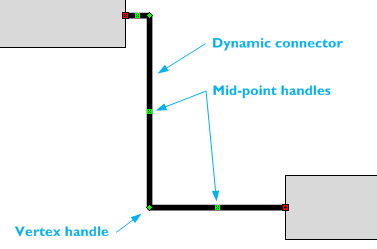
You’re probably familiar with the red handles, since they are the Begin and End handles that you drag around and connect to other shapes. When they’re red, they’re glued. When not glued, they are green like most other Visio handles (…until Visio 2010!)
But you’ll see two other styles of green handles. The diamond at each bend indicates a corner, or vertex The x-in-box along the lines indicates a mid-point handle.
If you pause your mouse over any of the handles, Visio will even give you a hint as to what they are for, popping up tooltips that say: “Adjust corner” or “Move midpoint”.
You can grab any of these handles and drag them around to adjust the appearance of your Dynamic connector. Vertices can be moved anywhere, and mid-points can be dragged perpendicular to the line. But there’s more to this story!
Making Angled, V-shaped Bends
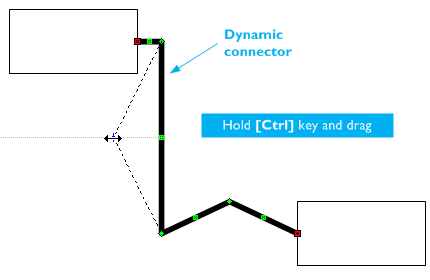
If you hold down the [Ctrl] key and drag a mid-point handle, you can create some crazy, angular bends. Check it out:
Making U-shaped Bends
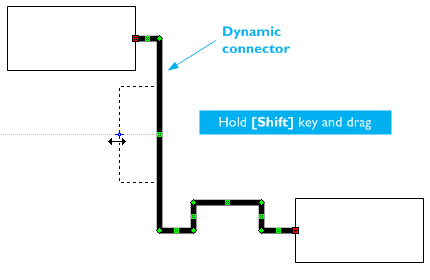
Similarly, you can hold down the [Shift] key and drag mid-point handles around to create additional, rectilinear jogs in your connector:
 Mix and Match!
If you’ve had too much coffee, you can [Ctrl] + drag and [Shift] + drag to excess:
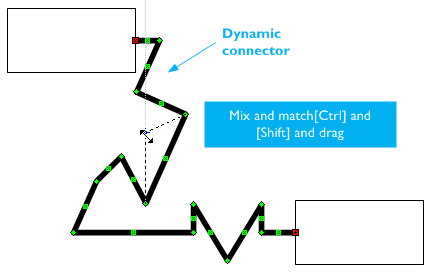 That’s one process that definitely could be more efficient!
Getting Rid of What You Have Wrought
The mid-point and corner handles are a bit different from normal vertices you might have encountered on other Visio shapes.
Perhaps you have played with editing vertices on other shapes and noticed that they can be statically selected and deselected? Say you draw a rectangle, then switch to the Pencil or Line Tool, while leaving the rectangle selected. You’ll see little green vertex handles, that look like the corners on a Dynamic connector. But if you click on one of these handles, the handle turns red, indicating you have highlighted it. Click it again and it turns green again. [Shift] + click lets you select multiple handles. Hit delete and the selected/red handles will go away!
The handles on the Dynamic connector don’t behave the same way though. You can only drag them around with a click + drag. You can’t actually click on them to mark them as selected. They are Drag Only, so to speak. This means that you can’t delete them in the same way that you do with normal Visio geometry.
So how do you get rid of unwanted extra bends?
You make them look like they aren’t needed anymore!
The Dynamic connector is smart enough to know when a handle isn’t needed anymore. If you drag a handle such that it is in-line with another leg of the connector, Visio will recognize that the handle you are dragging is no longer needed. You’ll still need the tricks we’ve discussed before, though. To get the job done, you might have to hold down [Ctrl] or [Shift] while trying to get the handle back into line.
Below, we show how to get rid of a U-shaped jog. While holding down the [Shift] key we drag the handle back in-line with the rest of the path:
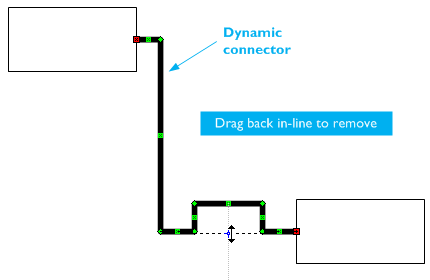
Visio sees that the jog is now in-line with the other legs and gets rid of superfluous handles. Tada!
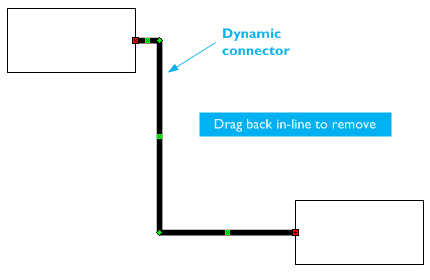
So that’s one more item to toss into your bag of Power User Visio tricks!

Way too much fun!! I just wasted 15 minutes playing around with dynamic connectors between two simple boxes. I’ll send you the bill for my time. 😉
Good job, Paul!
Wasting time with Visio is time well-wasted!
Thank you so much for this tip. I use Visio regularly, but not enough to get real good at it. I’ve always been frustrated with trying to get connectors to do what I want and your tips have saved me all kinds of time now. Sometimes it’s the simplest things that make a task pleasant or painful.
The handles are grayed out when I use the dynamic connector and won’t let me manipulate them. How do I get them green so I can manipulate them to bend where I want them to bend?
THanks,
Julie
Julie, tell them all the cool connectors are doing it and possibly give them some alcohol.
Thank you, I wish this type of help was built into Visio.
I can select the 2D shapes based on their layer properties using VB comment. Now I want to collect the connectors which connected to these shapes. But don’t know how.
Could you help please.
Hi Jing,
Look for the Page.CreateSelection method in the SDK documentation. You can select shapes by master, and the connector is an instance of the “Dynamic connector” master.
Thx, Visio Guy. I am a beginner. Could u pls send me the link of the SDK documentation. Jing
Pretty easy to just Google/Bing for “Visio SDK”, but here you go anyway 🙂
Download the New Visio 2010 SDK!
Thx, again. But it won’t help. Any download is blocked from my company’s firewall. I checked from visio active help and could not find the real help for selecting the connectors based on the selected shapes using VB.
When you look at 2D shapes, analyze the FromConnects collection. These are usually the connectors glued to each shape.
If you have Visio 2010, it’s even easier: you can use shp.GluedShapes or even shp.ConnectedShapes.
ConnectedShapes bypasses the connectors and gets you the next 2D shapes that are connected (via connectors), so you don’t have to deal with the “middle man”.
Thanks a ton Visio Guy – I knew there had to be a way to make that elusive U-shaped bend! After spending an hour trying all sorts of Shift, Ctrl and Alt combinations with the mouse on the connectors (just not on the handles… d’oh) and poring over search results, I found this page just in time to save my sanity and some of my hair! And very well presented to boot!!
Can any one help me.
I need VBA code to get a connection point on the middle of dynamic connector.
Thanks
Prasad
Thank you for this info! Its been very helpful. Great straight-forward and well diagrammed explanation.
Thanks for chiming in Romie, always glad to provide helpful information to you folks out in Internet Land!
Chris
Thanks a lot great page. My morning is now less of a waste of time than before I read this page.
Thank you for this straight forward explanation. I was not able to find this information on any microsoft support page.
Glad to help, Urs!
And how does one do that with curved connectors?
For some strange reason some of my curved connectors have a single bend point only, some have two. I need to be able to add and remove such bend points, because the automatic layout in a case at hand is really bad.
M.
Thank you! Thank you! Thank you! The [Shift] key trick is is EXACTLY what I needed to manually reroute connectors.
Hi Visio,
I need VB.net code to connect two boxes without arrow heads.
Please can you let me know the code required to achieve it.
Regards
Milan
I have a regular straignt connector that I need to add an additional bend to go right angle down. How do I add additional bend points? I have Visio Pro 2010
thank you
I am going to design a while loop in which the body of the loop(i.e containingvisio shapes )must be put inside a outer rectangle.This has to be done automatically from c# in visual studio 2010.Can anyonne suggest a method to don it.
Wow amazing TY needed this for so long
Very nice tutorial.
Thank you very much.
Jeff
with visio 2013 – i am not able to change the compound type for lines or connectors as it stays greyed out – request help
Very good explanation. Thank you !
I’ve been using Visio at my job for many years, and I had no idea about this. How cool. Thanks.
I am using MS Visio 2013 — I used to to be able to do rounded right angle lines — I cannot find a way to do this with Visio 2013. Am I mission something or has this capability been removed?