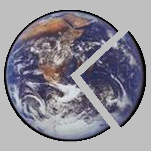
 Sure you can import bitmaps and images for use as Visio shapes. But imports are always rectangular, and they can have unappealing or distracting backgrounds that you’d rather not look at. While Visio doesn’t have a masking capability or an irregular-cropping feature, there is a technique that will allow you to get the same effect!
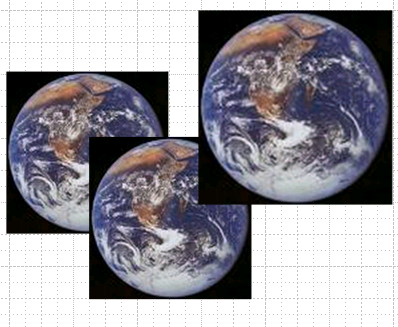
A recent post to the microsoft.public.visio newsgroup asked about the possibility of irregularly cropping images in Visio. It’s not hard to see why we’d want to do this. Here, we’ve imported an image of Earth into Visio, but are saddled with the black background, which not only clashes with the page color, but makes overlapping shapes look poor. Wouldn’t it be great to snip away the surrounding space?
John Goldsmith, of visualSignals answered the post by proposing a very creative solution that utilizes Visio’s Custom Patterns feature. Now, we’ve done this ourselves many times before, but it never really dawned on us that this was the Irregular Cropping Feature in disguise! Thanks to John for switching on the light bulb!
The solution is quite simple, actually. You create a new Visio custom pattern, and paste your image into it. Then you create any shape on the page — say a circle or a free-form curve, and apply the custom pattern to the shape.
If you are comfortable with custom patterns, then you’ve probably stopped reading already. For those that aren’t, read-on!
The first step is to create a custom fill pattern:
- Show the Drawing Explorer window via View > Drawing Explorer
- Right click the Fill Patterns tree node
- Select New Pattern from the context menu
You’ll be presented with the New Pattern dialog - Enter a name for your pattern, say “My Image”
- Check the Fill Pattern radio button
- Select the Stretch behavior, which is the right-most button:
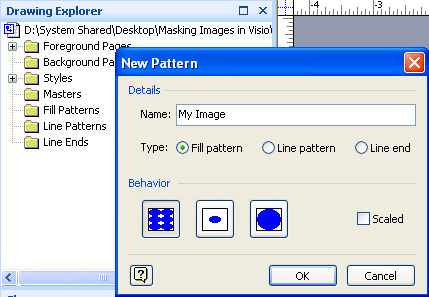
Next, we need to edit the custom pattern by placing the image inside the pattern container:
- Double-click the My Image tree-node under the Fill Patterns tree
A window with a blank Visio page will appear - Paste an image that you have copied from another source into the window, or import an image using Insert > Picture > From File…
- Close the window and accept the changes
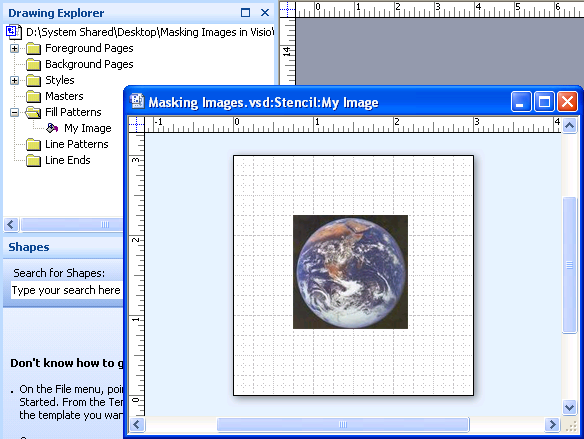
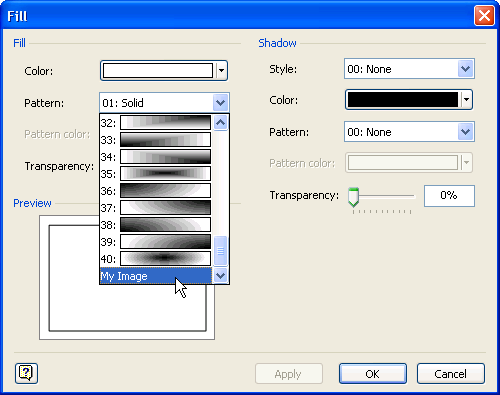
To apply the pattern, simply create a shape, then choose Format > Fill from the main menu. Custom patterns will appear at the bottom of the Pattern drop-down list. In this case, we’d scroll down to the bottom and select My Image.
Below are a few examples of some of the neat things you can do, once you’ve got this functionality in your toolbox!

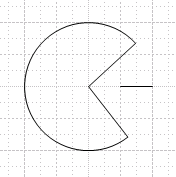
You can create a pie shape, like the one above by drawing a circle, then drawing an L-shape with the Line Tool. Select both shapes, then choose Shape > Operations > Fragment to cut the L out of the circle.
You’ll notice, now, that the pie is not as wide as it is tall, since we’ve removed a chunk. This will mess up how the Earth-image distributes itself inside the outline. We can rectify this by adding a dummy line to the wedge, so that the shape is again as wide as it is tall.
Just draw a line segment to the right, as shown below, then select both shapes and combine them using Shape > Operations > Combine. After we apply the image pattern to the shape, we can apply a No Line line style, so that the line segment doesn’t show.
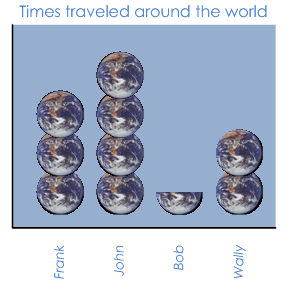
Now that we don’t have that annoying rectangular shape, we can effectively overlap the image-shapes, as shown here:
For more information about creating Custom Patterns in Visio, see the article: Custom Patterns in the on-line version of Developing Microsoft Visio Solutions on MSDN.
Thanks again to John Goldsmith for inspiring us to publish this article. Check out visualSignals’ web site if you are interested in custom-built, Visio-based visual reporting systems for your business!

now if only there was a way to fit that image to fill text. i know this is possible with photoshop et al but i was trying to get an image to text of fairly large point size in visio. i couldn’t think of a way
Hi Ravi!
You’d have to get an outline of that text into Visio as an imported vector-graphic. Illustrator and Freehand have ways of converting text to outlines.
Also, you could create your text with WordArt in, say, Excel or Word. It’s usually under the 3D-looking “A” in one of the toolbars at the bottom of the window.
Create your WordArt object, then copy-paste to Visio. Ungroup it, and you’ll have your text outlines! You’ll probably have to delete some shapes, as you end up getting separate shapes for fills and outlines. When you’ve cleaned it all up, select all of your outlines and combine them, via: Shapes > Operations > Combine.
Unfortunately, I’ve found that the outlines get a bit sloppy when you do this, but it’s better than nothing, and it can be done quickly.
Have fun,
– Chris
For some reason it doesn´t work on my Visio 2003.
I apply the pattern to my custom figure yet nothing happens… is there something missing in the pattern creation I am missing?
I create the pattern with a photo, save the changes, and when apply the pattern to the figure it just does not show any pattern.
Any insight?
Thank you
Daniel
P.S. Amazing web.
Hi Daniel,
I’m not sure what is wrong. Does your figure take a normal fill color (ie: is it in fact “closed” so that it can be filled?)
Also, I think in older versions of Visio it might be important to get the picture into Visio via the “import” function, as opposed to cut and paste. Or at least make sure you Paste Special > As Image (not metafile).
Those are the only things I can think of off the top of my head.
Hi Visio Guy,
Maybe this is not the right place for this, but here goes.
Here is my issue. I have copied an image from MS Paint and pasted it to Visio 2007. Now I would like to at a text field identical to the ones that come with Visio. The ones that have the Yellow dot so you can move them around and resize the text box. I know I can add a text box and group it with the image, but that’s not what I want to do.
Any help would be greatly appreciated. PS: I am not a programmer.
Very cool trick. Thanks Visio Guy! That was exactly what I was looking for.:-)
Such a lifesaving technique deserves heaps of praise and gratitude. So, I give you 99% praise and 1% help by describing an obstacle I had to overcome.
I discovered that (for Visio 2003, at least) the photo that will serve as the fill must be cropped outside of Visio, saved temporarily, and then file-inserted into the Fill Pattern template page. I found that if I cropped the photo inside of Visio first, the Fill Pattern template would fill the Visio shape from the entire uncropped image, which was still in memory.
My original challenge was to create a doughnut hole in order to put a photo behind it. You taught me how to paste a circle over the center instead. Way to go! Thanks again.
Thank you for this information. It made my day.
This site really needs a thumbs-up feature! Glad to help!